
If you create user-defined hatches, which means that you specify the angle and spacing, you may want to save them for future use. You can easily do this using a tool palette.
First, create the user-defined hatch. In the Hatch and Gradient dialog box (or on the Hatch Creation tab in AutoCAD 2011), choose User-Defined as the type. Use the tools to specify the angle and spacing.
This hatch has an angle of 30° and a spacing of 0.25 units.
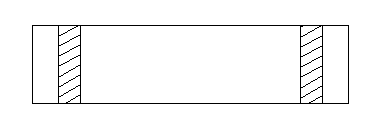
A user-defined hatch pattern in AutoCAD
Open the Tool Palettes window. (View> Palettes> Tool Palettes, or the TOOLPALETTES command)
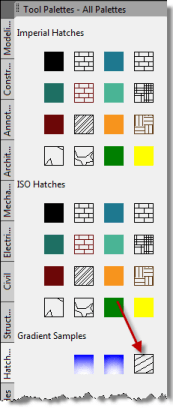
Click the Hatches and Fills tab.
Drag-and-drop cursor--for a hatch pattern
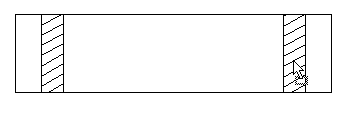
Select the hatch. Then click and hold until you see the drag-and-drop arrow, as you see here.
Then simply drag the hatch to the tool palette. Here you see the new hatch on the palette.
A user-defined hatch pattern on a tool palette
You can now drag this hatch into any closed area in your drawing.
Even better, because you have that hatch pattern saved in a tool palette, you can use it in any other drawing.
Did you find this tip useful? Sign up to get notified whenever I post new tips.
Related tips:
Add commands to tool palettes from the CUI dialog box

- Combine or subtract 2D shapes to create custom shapes - February 17, 2022
- Working with linetype scales - January 18, 2022
- Rename named objects–blocks, dimension styles, layers, and more - December 21, 2021


Good post. Kindly thanks for share.