
Visual styles were introduced in AutoCAD 2007. They bring your ability to control how objects look to a whole new level. You can control how faces and edges look, as well as display a background, shadows, materials, and lights — all without rendering the drawing.
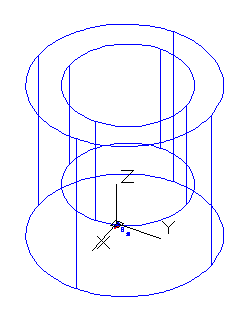 Visual styles are important when you want to create a presentation-quality drawing that still functions like a drawing, meaning that it can be edited. They can also help you visualize your drawing more clearly. Here you see the default 2D wireframe visual style.
To create a visual style, open a drawing with a 3D model, display it in a 3D view (Southeast Isometric, for example), and follow these steps:
- Open the Visual Styles Manager by choosing Tools> Palettes> Visual Styles, or use the VISUALSTYLES command on the command line.
- It’s useful to use an existing visual style as a basis for the new one, and in this tutorial, we’ll use the Conceptual visual style as a basis, so right-click the swatch for the Conceptual visual style, and choose Copy.
- Right-click in the swatches area, and choose Paste.
- Right-click the new swatch that appears (it’s called Copy 1 of Conceptual), and choose Edit Name and Description.
- In the Edit Name and Description dialog box, enter MyConceptual for the name. In the Description box, enter Sketch. Click OK. (Note: Recent releases of AutoCAD come with a visual style called Sketchy, but you’ll still learn about visual styles by following this tutorial.)
- In the Face Settings section, notice that the Face Style is Gooch, the Lighting is Smooth, and the Opacity is a negative number, meaning that it’s off. Also, the Material Display is set to Off and the Color is set to Monochrome. The Monochrome Color should be white (255,255,255). In the Environment Settings section, Backgrounds should be set to Off. In the Lighting section, Shadow Display should be set to Off.


- In the Edge Settings section, you may need to expand and scroll down. The Show settings should be set to Facet Edges. This places a line at the edge of each face.
- Set the Color to Red, or another color that contrasts with your models.
- In the Edge Modifiers section, click the left, small button to the right of the name of the section. If you watch carefully, you’ll see that this changes the value of the Overhang item from -6 to 6, turning it on.
- Click the right, small button in the same area. Now, when you click the Jitter item, you have a down arrow giving you other options.
- Click in the Jitter item, and choose Low from the drop-down list.
- Set the Crease Angle to 40. This reduces the number of facet lines on curves. If you have curved faces in your drawing, try setting this item to 20, then to 1 (the minimum), then to 180 (the maximum) to see the difference. The results will depend on the curved faces in your drawing. Set the Crease Angle back to 40. (For some reason, I was only able to use the up and down arrows to change this value; I couldn’t type a value.)
- In the Silhouette Edges section, set the Width to 7.
- Click the Apply Selected Visual Style to Current viewport button (above the settings but below the style thumbnails), to see the results of the changes so far.
- In the Occluded Edges section, set Show to Yes. This lets you see hidden edges, but without losing the feel of a solid. Again apply the visual style to the viewport.
- To save the visual style for use in other drawings, open the Tools Palette (Ctrl+3). Right-click the gray bar and choose Visual Styles from the list of palettes at the bottom.
- Drag your new visual style to any place on the Visual Styles tool palette.
- To use the visual style, you can now choose it from the Tool Palette window in any drawing.
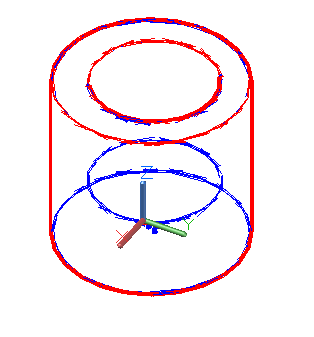
Here’s the final result. Experiment with other settings. There are a lot to choose from!
Do you create custom visual styles? What are the settings you use most?

- Combine or subtract 2D shapes to create custom shapes - February 17, 2022
- Working with linetype scales - January 18, 2022
- Rename named objects–blocks, dimension styles, layers, and more - December 21, 2021


There were some really good benefits to earlier versions that didn’t require all these tweaks. Why can’t there be an option to use these older settings without having to go through all of this to get the end results you’re looking for?
3d hidden visual style (2011)
hidden (2006)