
 This is a guest blog post by Parvez Mahmood, General Manager, Engineering Systems/ER Solutions in Islamabad, Pakistan. He has been teaching AutoCAD for last 10 years to industrial and university students.
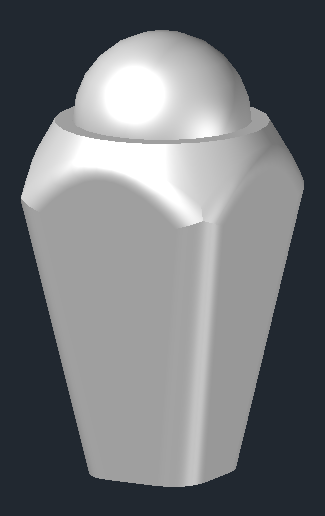
It’s a tutorial that will show you how to draw a fancy square glass bottle cap in AutoCAD. It’s a great AutoCad tutorial to work through if you want to advance your 3D skills.
On the right, you can see what the final bottle cap will look like, with perhaps slight differences in proportion, depending on the values you use.
Set up your environment
- Select Workspace 3D Basic/3D Modelling
- Ortho ON.
- UCS WORLD. (To align the object with the grid).
- View PLAN in world UCS
- Visual style 2D WIREFRAME
 Start drawing
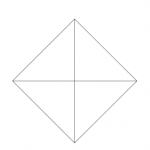
- Command Pyramid. Let default/select CIRCUMSCRIBED. Enter Start Point as 10,10. Enter base Radius 5 and height 20.
- Zoom IN/OUT and PAN to see the pyramid in the centre of the drawing area. See the figure on the right.
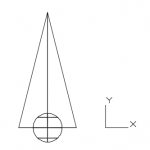
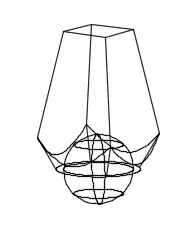
- Command Sphere. OSNAP ON. Move the cursor over the centre of the diagonal lines of the pyramid. It will be highlighted with cursor read out as 3D Center or just Center. Acquire the point by clicking and enter R2.5. (See figure below). The sphere will be formed at the centre of the base of the pyramid.
Author’s Note: If the VisStyle is not 2D Wirerame, cursor will acquire tip of the pyramid as 3D Vertex. The sphere will now be formed at the top tip of the pyramid. You will now have to move the sphere, selecting its centre as base point, by 0, 0, -20.
Ellen’s Note: I just see Endpoint or Center (not 3D Center or 3D Vertex) and it’s on top, so I have to move it down. Here you see the result in Left view.
- Change view to bottom.
 Set UCS WORLD. (If you don’t, the extrusion of step 7 will be away from the pyramid causing the operation of step 8 to delete both the pyramid and the truncated cone.
- Command Circle. Move the cursor over the centre of the crossing diagonal lines of the pyramid. 3D Centre point will be highlighted as in step 3. Acquire the point by clicking. Enter Radius 3. (Ellen’s note: I just see Center, not 3D Centre/3D Center.)
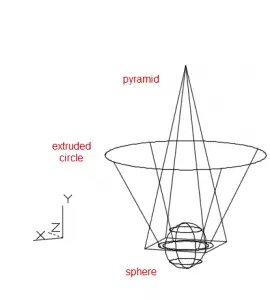
- Extrude circle with a Taper of -30 and and extrusion of 10 to create a cylinder . A truncated cone will be created overlapping and surrounding the pyramid. Here you see the result shown from the Left view.
- Perform Intersection of pyramid and cone. (Ellen’s note: Cool!)
- 3D Orbit the view a bit to see the inverted cap with all vertical and bottom edges clearly. (After the 3DORBIT command, click somewhere in the centre and move the cursor south and then slightly to either left or right to get the view as in the figure below. Enter to come out of Rotate command.
- Fillet any two adjacent vertical sides and then the other two with radius 2. (Ellen’s Note: Radius 1 worked for me. Also, I chose Selection panel, Filter, Edge.)
- Fillet any two adjacent bottom edges and then the other two with radius 2. (Try R 1 also). Note that these edges are now small segments This may be easier to do in Realistic view style.
- Union the parts.
Make final visual adjustments
- Change the Visual Style to realistic.
- Command Rotate3D. Select the cap. Enter. Choose X axis. Then asks for a point on the X axis. Then rotation. I accepted 0,0,0 and set rotation to 180.
- Select View TOP. The cap appears upright in the top view.
Here’s the final view again. (Ellen’s note: I think it’s beautiful!)

- Combine or subtract 2D shapes to create custom shapes - February 17, 2022
- Working with linetype scales - January 18, 2022
- Rename named objects–blocks, dimension styles, layers, and more - December 21, 2021


I’ll try this
Parvez and Ellen, thanks for the tutorial. They are very helpful while learning 3D.
I ‘ve tried and succeeded , thanks ellen