It’s always good to keep to your dimension styles as much as possible, but sometimes a situation requires an exception. You can create an override, which is a sub-dimension style that varies from its parent style.
Follow these steps:
- On the Annotate tab, click the Dimensions panel’s dialog box launcher arrow (the arrow at the right end of the panel’s title bar).
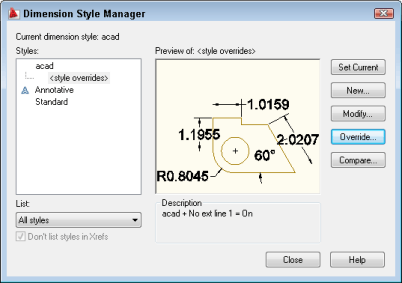
- In the Dimension Style Manager, choose the style that you want to override and click Override.
- The Override Current Style dialog box opens. This is just like the New Dimension Style dialog box and you make your changes in the same way you would to create a new dimension style.
- When you’re done, click OK. The override appears in the Styles pane of the Dimension Style Manager beneath its parent style.

- Click Close. Dimensions that you create now use the override settings.
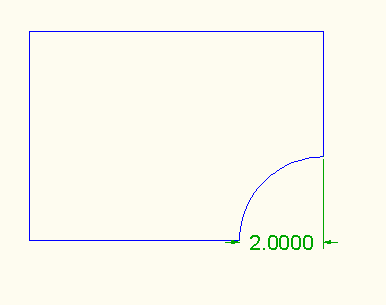
This override suppresses the left extension line.

To stop using the override, again open the Dimension Style Manager and choose the parent style as current. However, this discards the override.
To stop using the override, but save it for later, right-click the override in the Styles panel of the Dimension Style Manager and choose one of the following:
- Rename: Creates a new dimension style from the override. Type a new name and press Enter.
- Delete: This is the same as choosing the parent style and setting it current
- Save to Current Style: Changes the parent dimension to include the override settings
- Combine or subtract 2D shapes to create custom shapes - February 17, 2022
- Working with linetype scales - January 18, 2022
- Rename named objects–blocks, dimension styles, layers, and more - December 21, 2021

 Instagram
 LinkedIn
 Facebook
Leave a Reply