 This is a guest blog post by Jaiprakash Pandey, who is a CAD Corporate Trainer specializing in AutoCAD, CATIA and other CAD software’s. He is an Autodesk AutoCAD Certified professional and an Autodesk expert elite. He is a regular contributor to AUGI World magazine and he has also developed AutoCAD video courses for pluralsight, his own platform SourceCAD, and other E-Learning businesses. Explore more AutoCAD tutorials on his blog, SourceCAD.
* * * * *
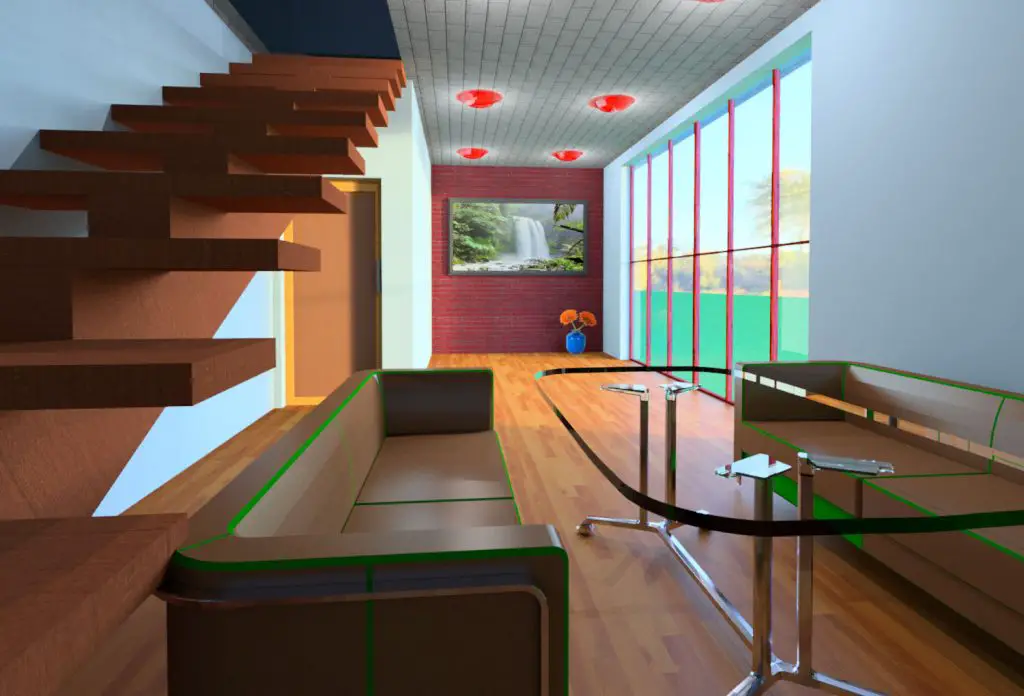
With AutoCAD, you can create a short animated walkthrough video of your architectural model that can help you in presenting your ideas in a more creative way. Using short animated walkthroughs you can simply convey a lot of information without using many tools or drawings and even a non-technical person will be able to understand your design ideas.
Here’s an example walkthrough video.
In AutoCAD, you can easily create a walkthrough video using the Animation panel. For this tip, I will use the sample model shown below and I will create a walkthrough in the interior of this house. I will use AutoCAD 2016 for explaining this tip.

By default, the Animations panel is not available on the Visualize tab, so go to the Visualize tab of the 3D modeling workspace and right-click on a blank area in the tab. Select the Show Panels option and then Animations from the contextual menu. The Animations panel will be added to the Visualize tab.
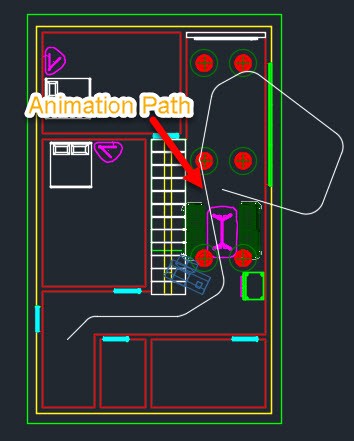
Before moving on with the animation options we need to specify the path of the camera for the animation. The path can be created using a polyline or a spline curve. In this case, I created the path using a polyline curve and I filleted sharp corners at the turns to give this path a smooth look.  Make sure your path is created at the approximate height of a human eye with respect to ground level to get best results, which in my case is about 6’.
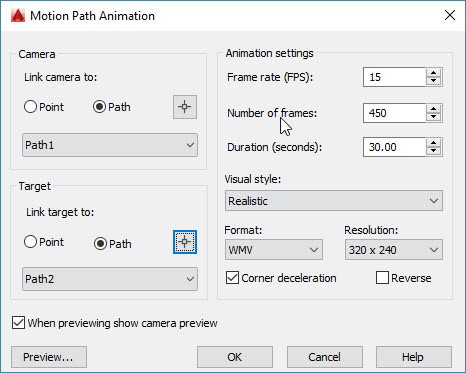
Now click the Animation motion path icon on the Animations panel of the Visualize tab. A new window will pop up where you can adjust settings of your animation. In the first Camera panel, select the Path radio button and click on the box right next to the path and select the path which you have drawn for the camera to follow for the animation. When a new prompt with the name of the path appears just click OK to choose the default path name. Similarly select the Path radio button from the Target panel and click on the selection box next to path radio button and select the path you selected in the previous step.
You can also select Point in this step if you want the camera to focus at a single point only. But in this case, I want my camera to follow the path instead of being focussed at a single point hence I selected Path in the Target panel.
From the Animation settings panel, select a frame rate of 15 frames per second to get an optimum quality video. Choosing a large frame rate will create a bulky video and it will also take more time to render the video. In the Duration field, select the duration of the animated video. For this case, I selected a duration of 30 seconds. Keeping higher value in duration will force AutoCAD to render more frames causing delay so try to keep this duration also to an optimum level.
In the Visual Style drop-down list, select the visual style in which you want to create animated video. For best quality animated video select the Realistic visual style. Select the video format and resolution from next two drop-down menus and select the Corner Deceleration check mark if you want to decelerate speed of camera at corners. See the image below for reference.

When all of these settings are done, click the Preview button at the lower-left corner of the Motion Path Animation window to see a quick preview and when you are satisfied with the preview. click OK .
AutoCAD will open file window where you can specify the location and name of the video file. Once you click Save, the video rendering process will start. Depending upon the duration and frame rate you assigned, it will take some time and the final video will be saved in the specified location.
- Combine or subtract 2D shapes to create custom shapes - February 17, 2022
- Working with linetype scales - January 18, 2022
- Rename named objects–blocks, dimension styles, layers, and more - December 21, 2021

 Instagram
 LinkedIn
 Facebook

i like it
Really useful tips! I haven’t even thought that there are so many fine points to pay attention to!
Dear Sir,
Thanks For Shearing Such Information, Your Article Is Very Information.
Very Helpful Articles.
Dear Sir,
Thanks for Shearing Such Information,
Very Interesting Post.
Dear sir, that’s such helpfull info and i tried i works good but I cannot publish my video file through, which format is better to use?
Thanks
Utkir