In an architectural drawing, you often need to break walls to insert a door. There are many ways to do this, but here is one way:
Let’s assume that you have a simple wall 4 inches thick. You want to insert a door that is 28 inches wide. You can easily translate these numbers into metric if you need to–the exact numbers don’t matter.
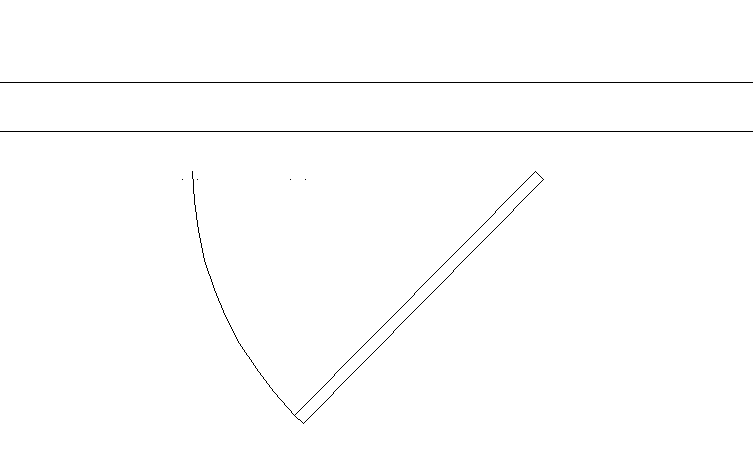
Use the BREAK command
- At the Select object: prompt, select the bottom line of the wall — the one you’ll attach the door block to.
- At the Specify second break point or [First point]: prompt, choose the First point option.
- At the Specify first break point: prompt, use an object snap to specify the point on the wall line. You’ll need to find some way to make this point exact. At the very least, use the NEA object snap to make sure that you’re exactly on the line.
If you use the NEA object snap, at the to prompt, click the line. Otherwise, specify the point using the object snap. - At the Specify second break point: prompt, specify the distance using relative coordinates. In this instance, you would type @-28,0 and press Enter
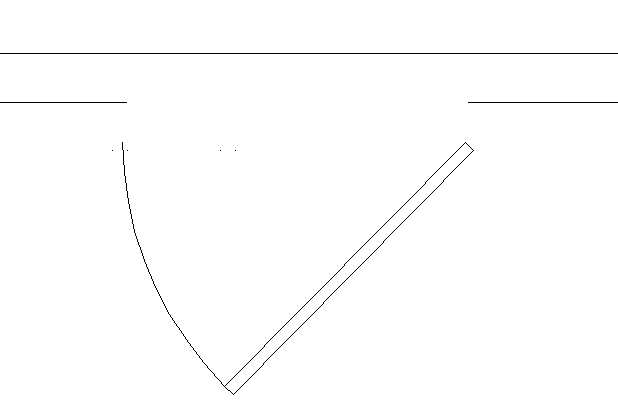
Draw lines to the other side of the wall
- Draw a line from one of the endpoints of the break to the other line representing the opposite site of the wall. You can use an Intersection or Perpendicular object snap.
- Do the same from the other endpoint.
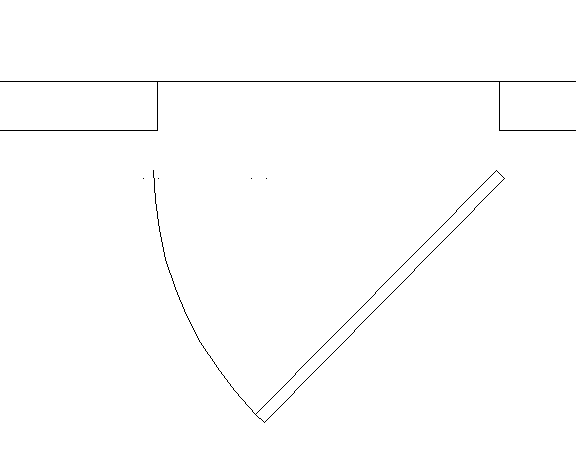
Break the other line
Start the BREAK command again. This time, it’s easy. Select the endpoint of the first short line you drew as the first point of the break and the endpoint of the second short line you drew as the second point of the break.
Move the door block into place
Ideally, your door block’s insertion point should be the point where the door meets the end of the wall. Here are the steps:
- Select the door block.
- Click the insertion point to make it “hot.”
- Press the Spacebar to display the Specify move point: prompt.
- Move the cursor to the endpoint of the wall and the short line you draw and click.
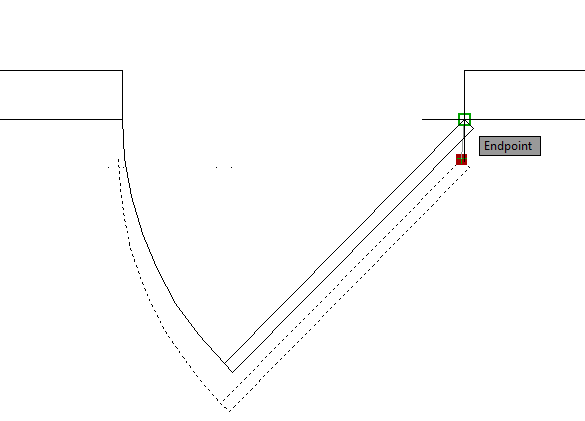
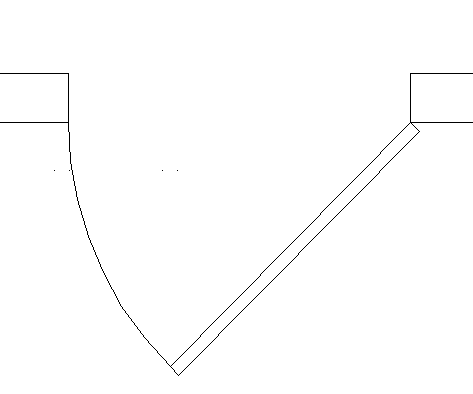
Deselect the door. The door is now in place between the break in the wall.
Do you use a different method. Let everyone know!
- Combine or subtract 2D shapes to create custom shapes - February 17, 2022
- Working with linetype scales - January 18, 2022
- Rename named objects–blocks, dimension styles, layers, and more - December 21, 2021

 Instagram
 LinkedIn
 Facebook
seems to me a somewhat complicated way. I use a door-block with a wipeout the size of the wall (if you want to use several widths; make the block dynamic and use visibility for the various widths). Als long as the two short lines perpendicular to the wall are part of the block, it’s simple. If you decide to later move the door, or even switch to a different wall-thickness, it’s equally simple.
I enjoy your tips very much and find them very usefull most of the time.
Its easier to draw two lines on de wall and trim in between or to incorporate the trim lines in the door block you can trim with entities placed in a block
Hans
This seems like way too many steps. I just use simple Plines to draw the two sides of the door opening and then use TRIM to remove the opening. Then insert my scalable door block to the exact width of the opening.
Thanks to both Paul, Hans and Frank for that alternate method, using TRIM instead of BREAK. Frank, do you leave the wall untrimmed, with the door on top of it?
yes, the wall remains untrimmed. repositioning the door is easy that way, because you don’t have to stretch both wall-ends every time you want to reposition the door. no trouble in case the wall is hatched also. of course it is a kind of fake drawing, because there are no holes in the wall in the actual drawing, but in my case (i’m an architect) in practice we work with paper drawings. never seen a contractor with an ipad on the job (not till now anyway).
Am I crazy or is the hinge on the wrong side of the door?
Todd not if it is a protruding door leaf which doors for refrigeration units have, although I would expect that to be thicker
Mline then scale, put the wide and them use trim, I think is faster this way.
Todd. Maybe just a little, but I do not know you. 😉 This is actually a very common way to show doors, at least in architectural drawings. Dispite its inaccuratcy. My method is to create a lisp routine to do the door opening. Three point and done. Creates door opening, framing opening, and even inserts door type. And puts door on layer of choice. Working on doing this using DCL. Still working on that.
Is there an easy way to create a wall by using the break command?
I enjoy your tips very much and find them very useful most of the time. Thank you so much for sharing with us.
Nikjow
Interesting ways of accomplishing the same thing.I use AutoCAD Architecture 2014. However there are times I want / need the walls exploded to make changes.
What I’ve tried to do with exploded walls is insert a dynamic door but I still need to break the walls. These tips will come in handy. I curious Frank about your method. Can you elaborate more on the steps. Maybe a drawing to help.
I’m often trying to make my work flow more efficient.
Thanks everyone who posts these tips. Hundreds/thousands view them are put into use.