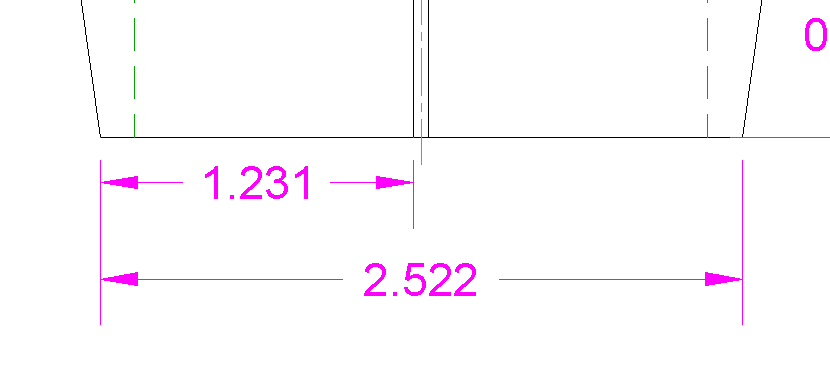
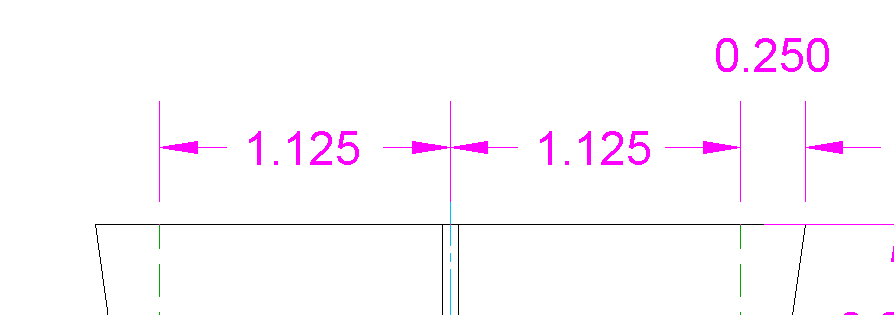
Baseline and continued dimensions are linear dimensions that are based on an existing linear dimension:
- Baseline: The second and subsequent dimensions all start at the same point as the existing dimension but end at a different point
- Continued: The second dimension starts at the end point of the existing dimension
Create a baseline dimension
First, create a linear dimension. Then, go to Annotate tab> Dimensions panel and click the Continue drop-down list, choosing Baseline. This starts the DIMBASELINE command. You see the Specify a second extension line origin or [Undo/Select] <Select>: prompt.
- If you just drew a linear dimension, AutoCAD remembers that and you can simply specify the endpoint of the new baseline dimension. The command automatically uses the start point of the existing linear dimension as the start point for the baseline dimension.
- If you drew the linear dimension at some other time, press Enter to use the Select option. At the prompt, select the existing linear dimension that you want to use. To get accurate results, pick the existing dimension closest to the end that you want to use as the baseline. Then you can go on to specify the endpoint of the new baseline dimension.
You can continue to place more baseline dimensions. Press Enter twice to end the command.

A baseline dimension
Create a continued dimension
First, create a linear dimension. Then, go to Annotate tab> Dimensions panel and click the Continue drop-down list, choosing Continue. This starts the DIMCONTINUE command.
- If you just drew a linear dimension, you see the Specify a second extension line origin or [Undo/Select] <Select>: prompt. You can simply specify the endpoint of the new baseline dimension. The command automatically uses the endpoint of the existing linear dimension as the start point for the continued dimension.
- If you drew the linear dimension at some other time, you see the Select continued dimension: prompt. (If you see the Specify a second extension line origin or [Undo/Select] <Select>: prompt, press Enter.) Select the existing linear dimension that you want to use; it doesn’t have to be a continued dimension. To get accurate results, pick the existing dimension closest to the end that you want to use as the beginning of the continued dimension. Then you can go on to specify the endpoint of the new continued dimension.
You can continue to place more continued dimensions. Press Enter twice to end the command.

Continued dimensions
Note: Although the most common baseline and continued dimensions are linear, you can also create them for angular and ordinate dimensions.
As with other dimensions, always use an object snap to specify the endpoint of the baseline dimension.
Do you have tips for drawing accurate baseline and continued dimensions? What other types of dimensions do you draw? Ordinate? Inspection? Tolerances? Please share by leaving a comment!
- Combine or subtract 2D shapes to create custom shapes - February 17, 2022
- Working with linetype scales - January 18, 2022
- Rename named objects–blocks, dimension styles, layers, and more - December 21, 2021

 Instagram
 LinkedIn
 Facebook

Dimensions in brickwork modules would be a great advantage to me and many other CAD Users. Has a lisp program been done for this yet.?