
One of the tools we often use by technical professionals such as architects and engineers is the computer-aided design (CAD) program. Nowadays, it is one of the crucial tools in delivering contract documents for construction and other technical businesses. It is initially meant to aid us in realizing projects by producing drawings that are portable, easy to revise, and coordinate among different trades.
Throughout the years, the CAD system in place also adapt to the changing technology, from what used to be ordinary drawings and linework, it can now handle three-dimensionality and create rendered pictures as well. Such flexibility and evolution allow CAD to remain as a staple tool for designers and architects such as myself.
As it is something that is meant to aid our manual drafting systems, it is not to say that it doesn’t have any flaws. As younger generations of architects took up skills for CAD, earlier generations of architects might be unable to allot time to learn such new developments. What used to be their guidelines on paper became XLINE in CAD, stacks of tracing papers to LAYERS toolbar, while copy and array will be painstakingly transferred manually before, now it can be accomplished by clicking a button or typing a command; and so, the list goes on.
Take for example, those huge drawing we used to transfer to trace or use it as reference now becomes an XREF or BLOCK in CAD. While if we needed just a portion or make an item appear on top, we need not to trim the drawing piece by piece but instead use tools such as XCLIP and WIPEOUT.
XCLIP is like cutting a paper to patch an area in the drawing, or a Microsoft Windows snipping tool where you can just capture a portion. It is a useful tool that allows you to snip what you like without exploding the XREF or file that you referred to. This allows for a lighter file since there is no need to explode a component or to go through components to hide certain layers just to edit a part of the block.
I find using XCLIP useful especially when there are areas in my XREF that I wanted to use only as a reference. To navigate the XCLIP tool, here’s an example:
Prepare the drawing to be referenced:
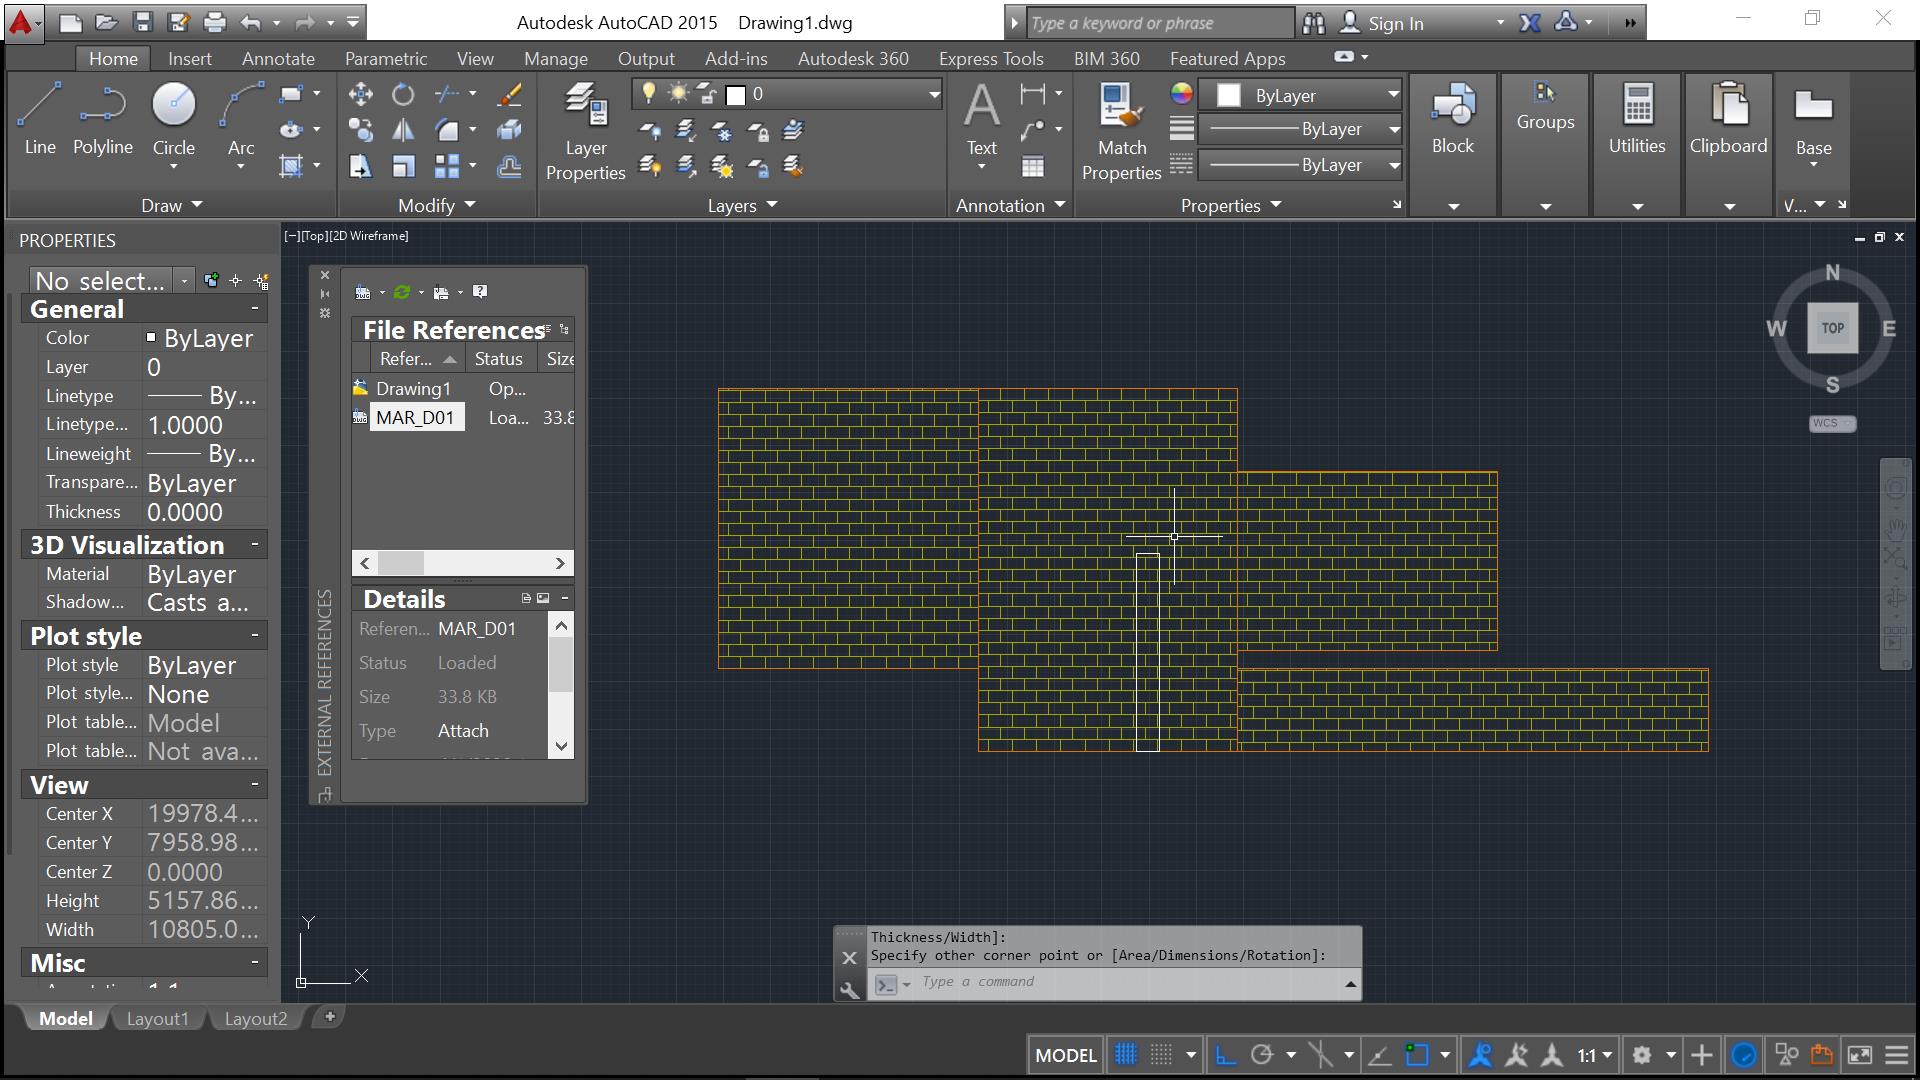
- First, identify the CAD file you wanted to load into your file (Here we selected file MAR_D01.dwg which contains the file we want to reference). To load the file to your drawing, type XREF into the command line, press ENTER.
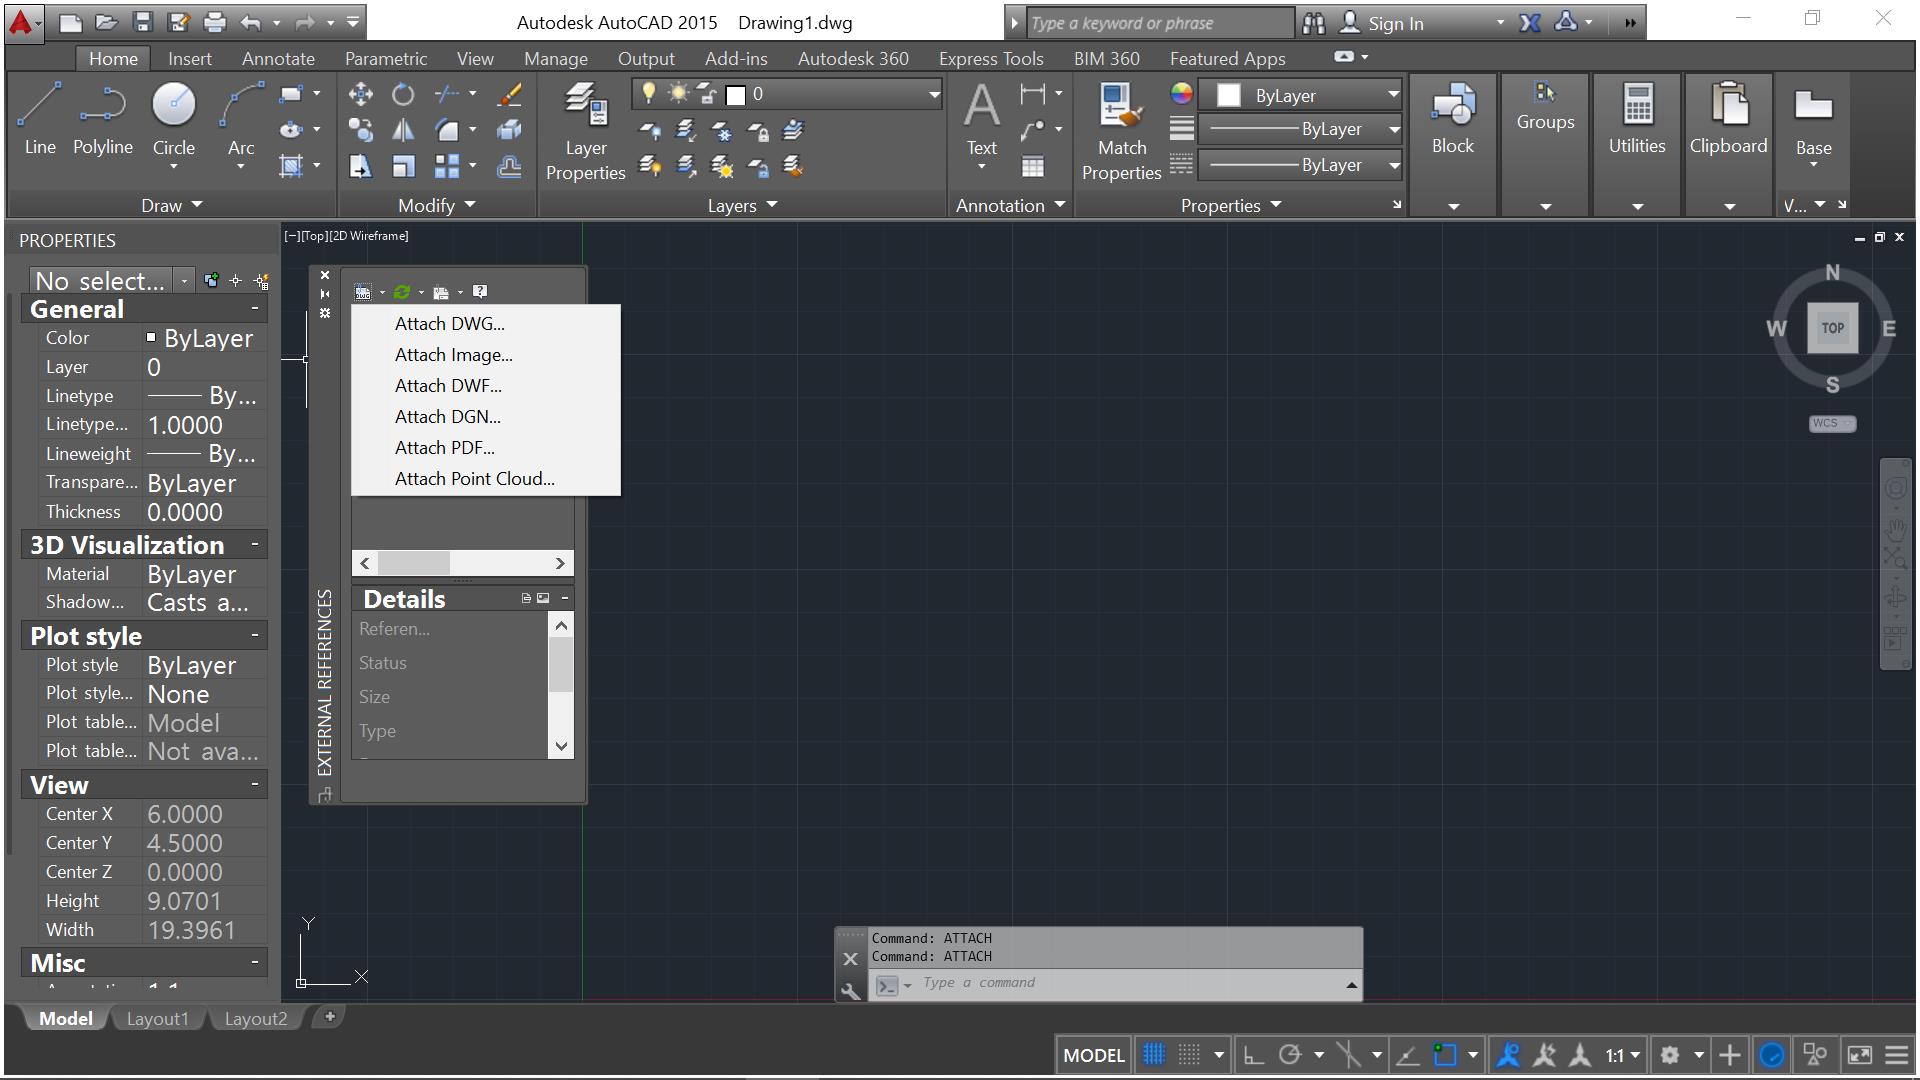

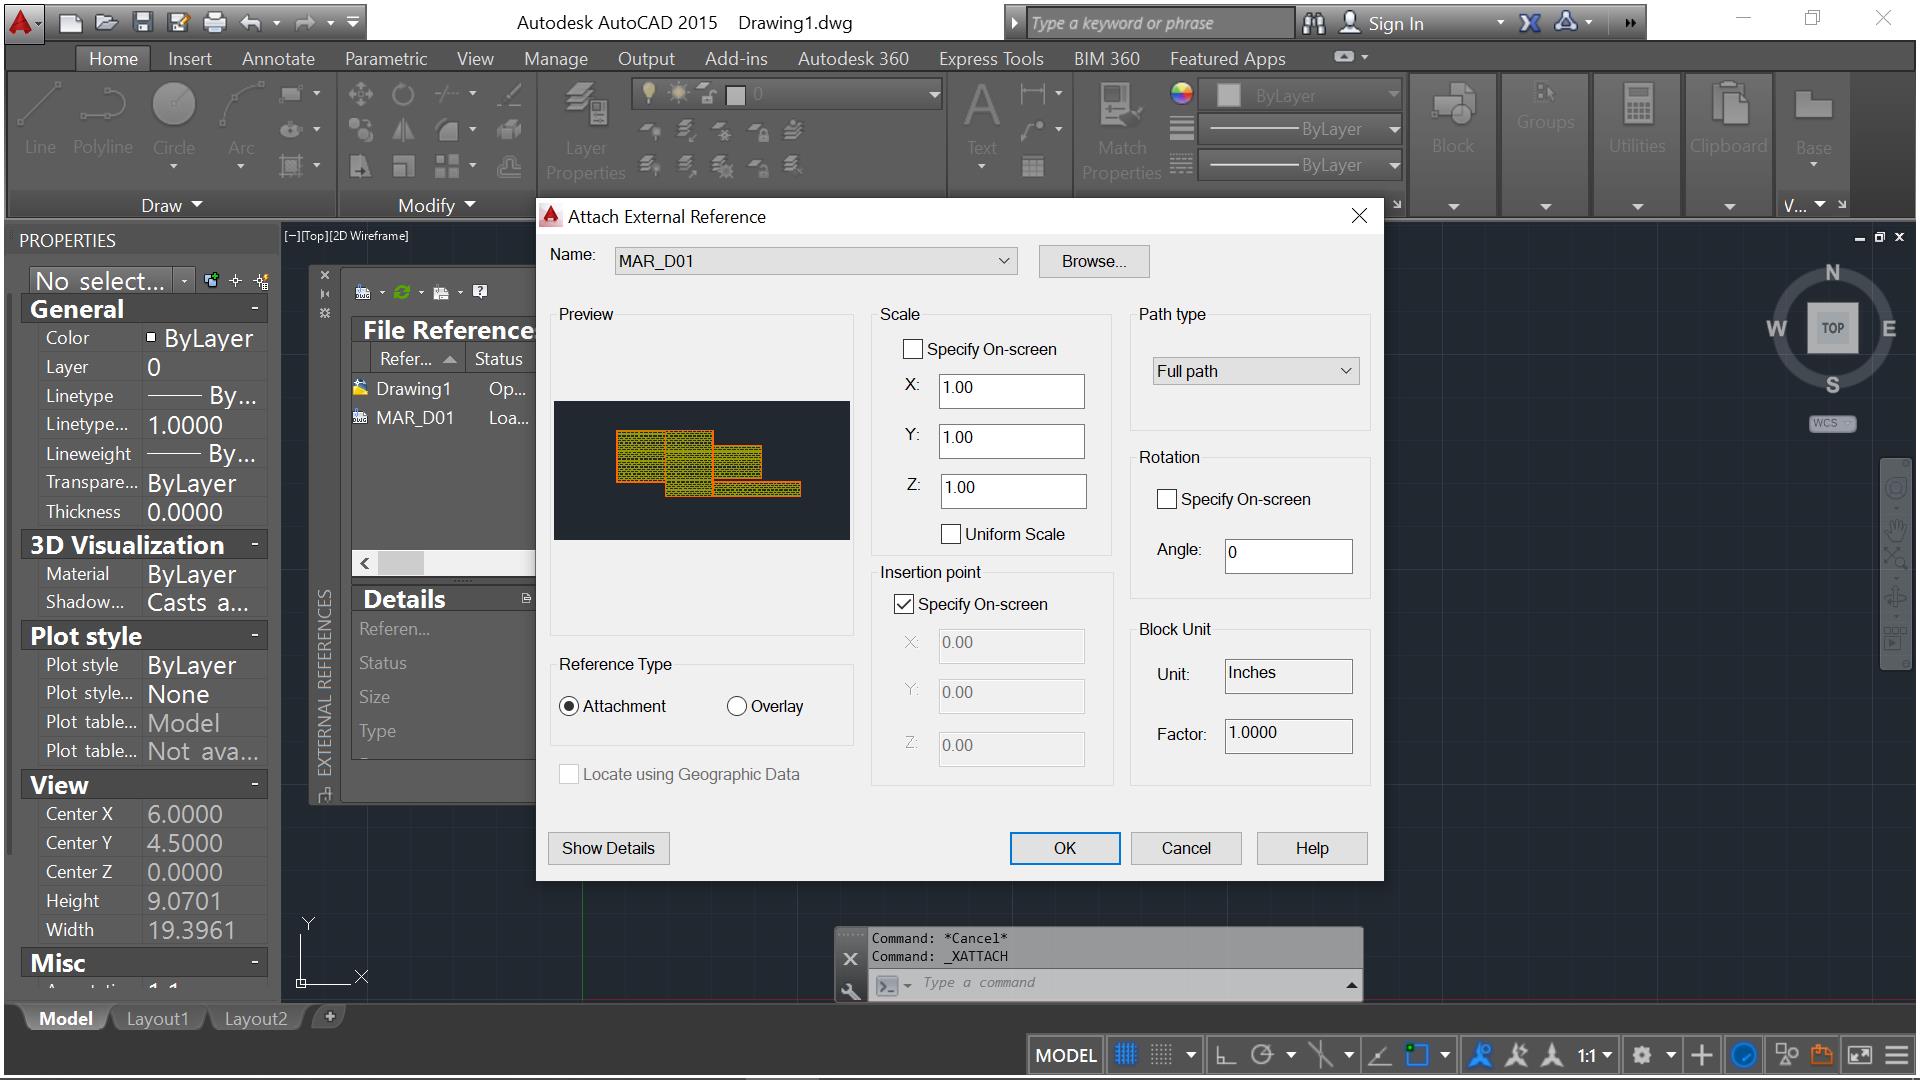
- Once the dialog box is up, Type ATTACH in the command line or select the DWG icon in the toolbar (A drop down list is available to select the type of file you want to load – AutoCAD files, Image or PDF). Once a pop up window comes up, select the drawing you want to load, select OPEN. For more information on how to overlay or fully attach your XRef file, click here.
- Once loaded and placed inside the drawing, you can now decide which part to use the XCLIP on. You can now navigate the XCLIP Command
Navigating the XCLIP tool:
- To navigate the XCLIP frame, type into the command box XCLIP, press enter. It will prompt you to select the item we want to clip. Alternatively, you can right-click in the drawing and choose CLIP XREF
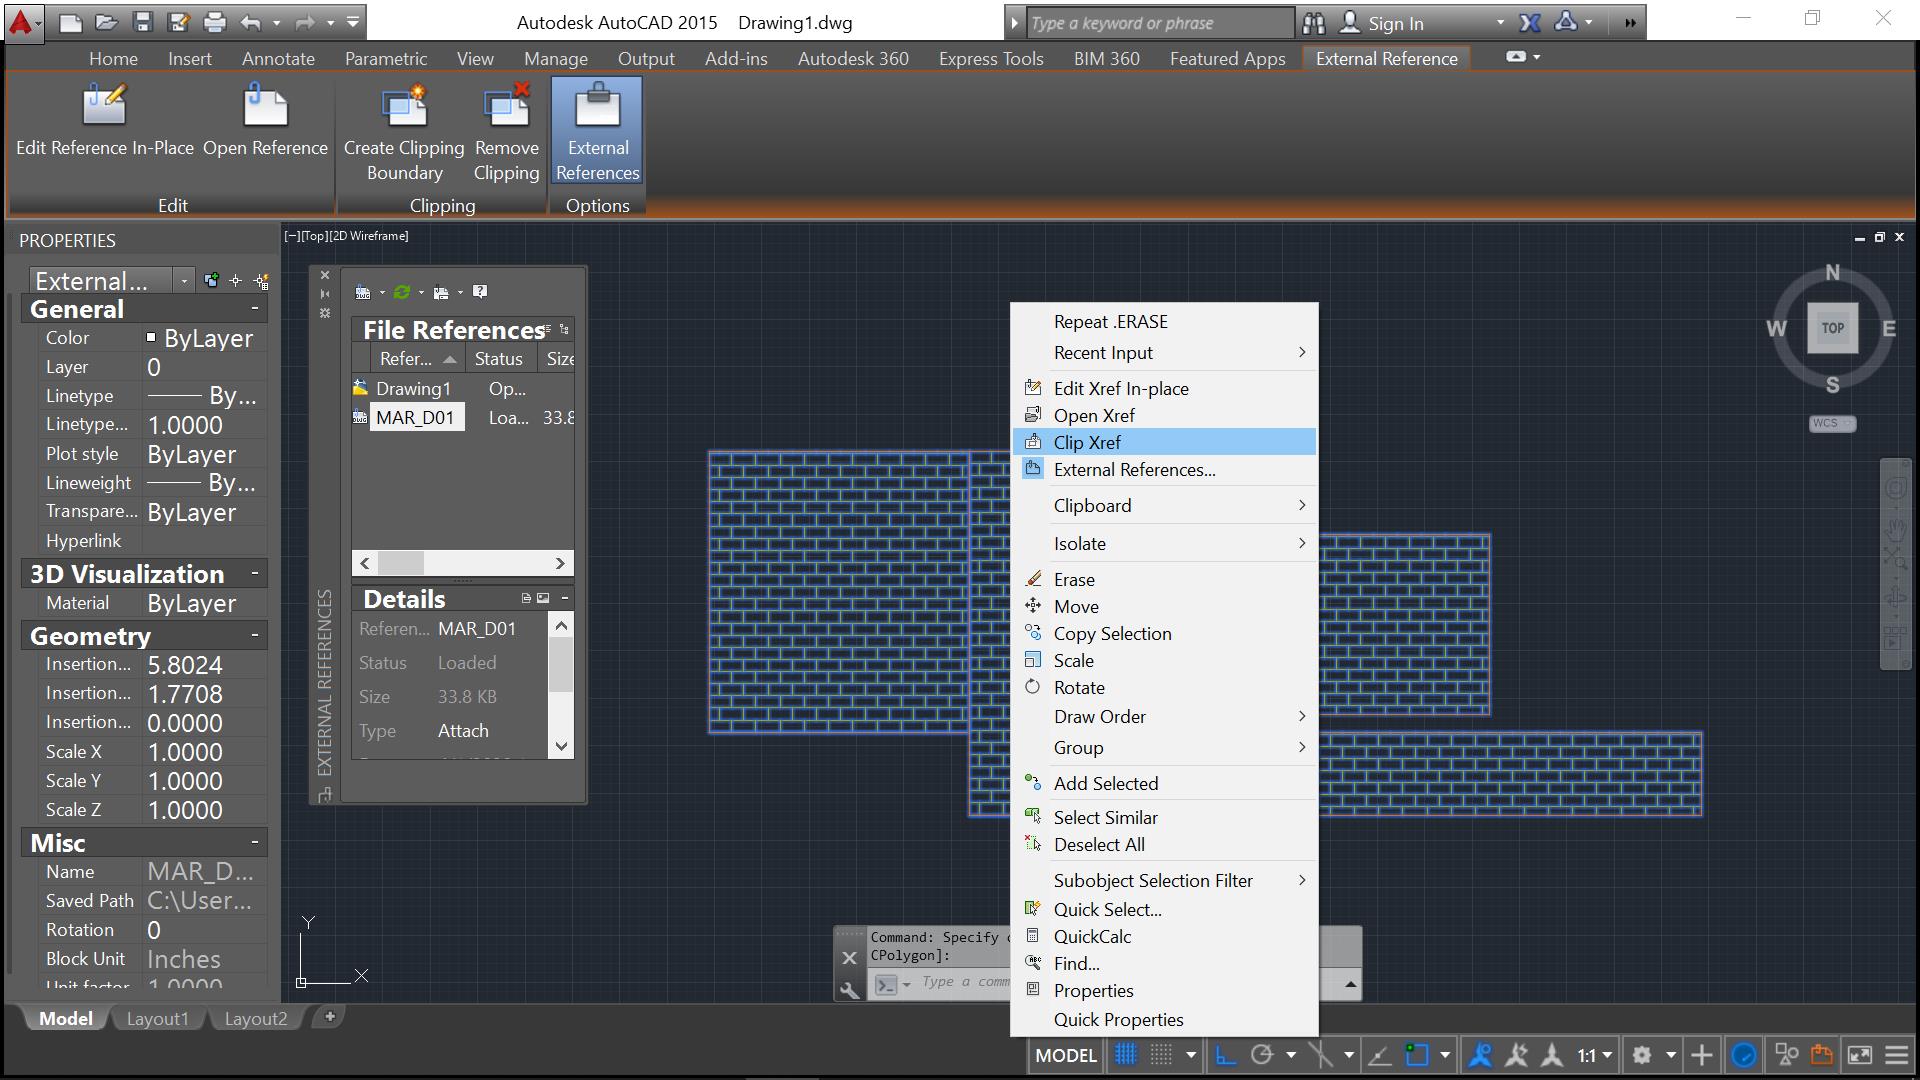
- Click on the XREF on the sheet (MAR_D01.dwg)
- Clipping options will appear and request for your desired action. ON, OFF, Clipdepth, Delete, generate Polyline or New boundary. Select New boundary or type N
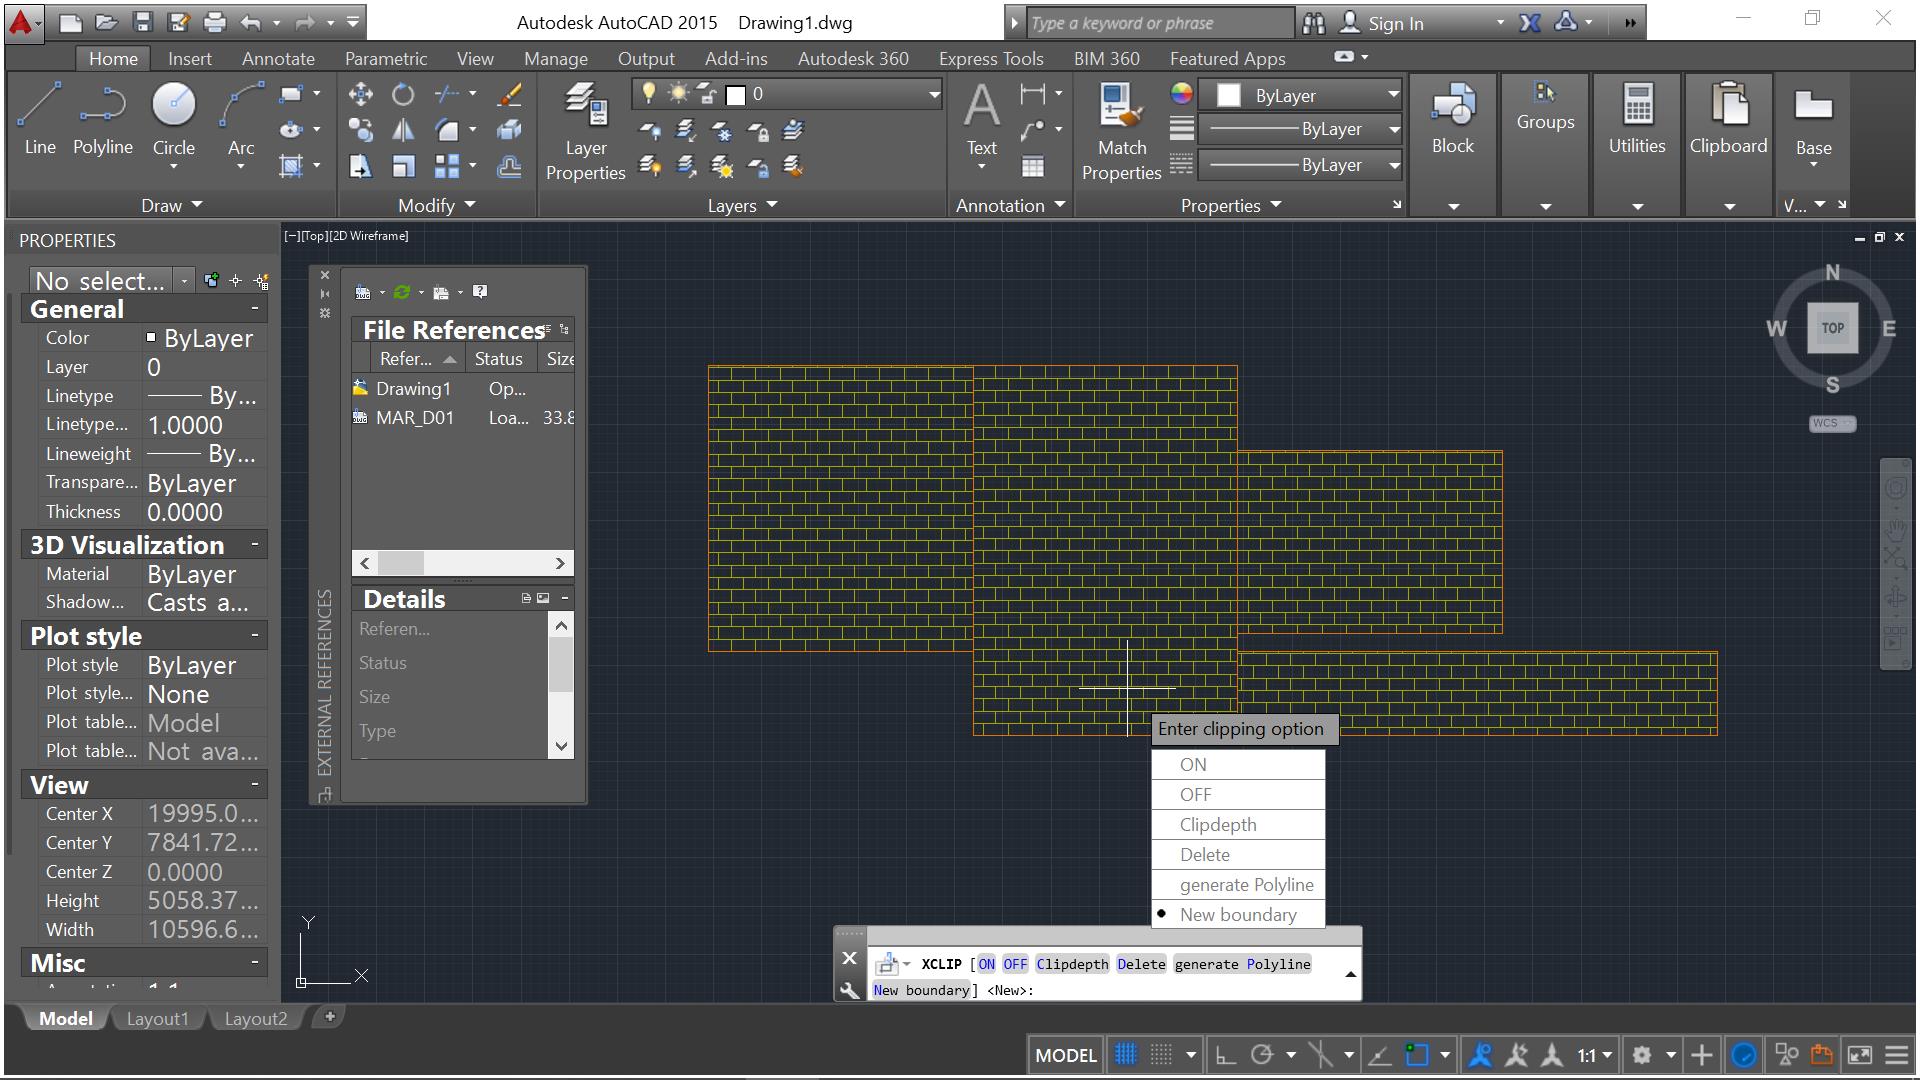
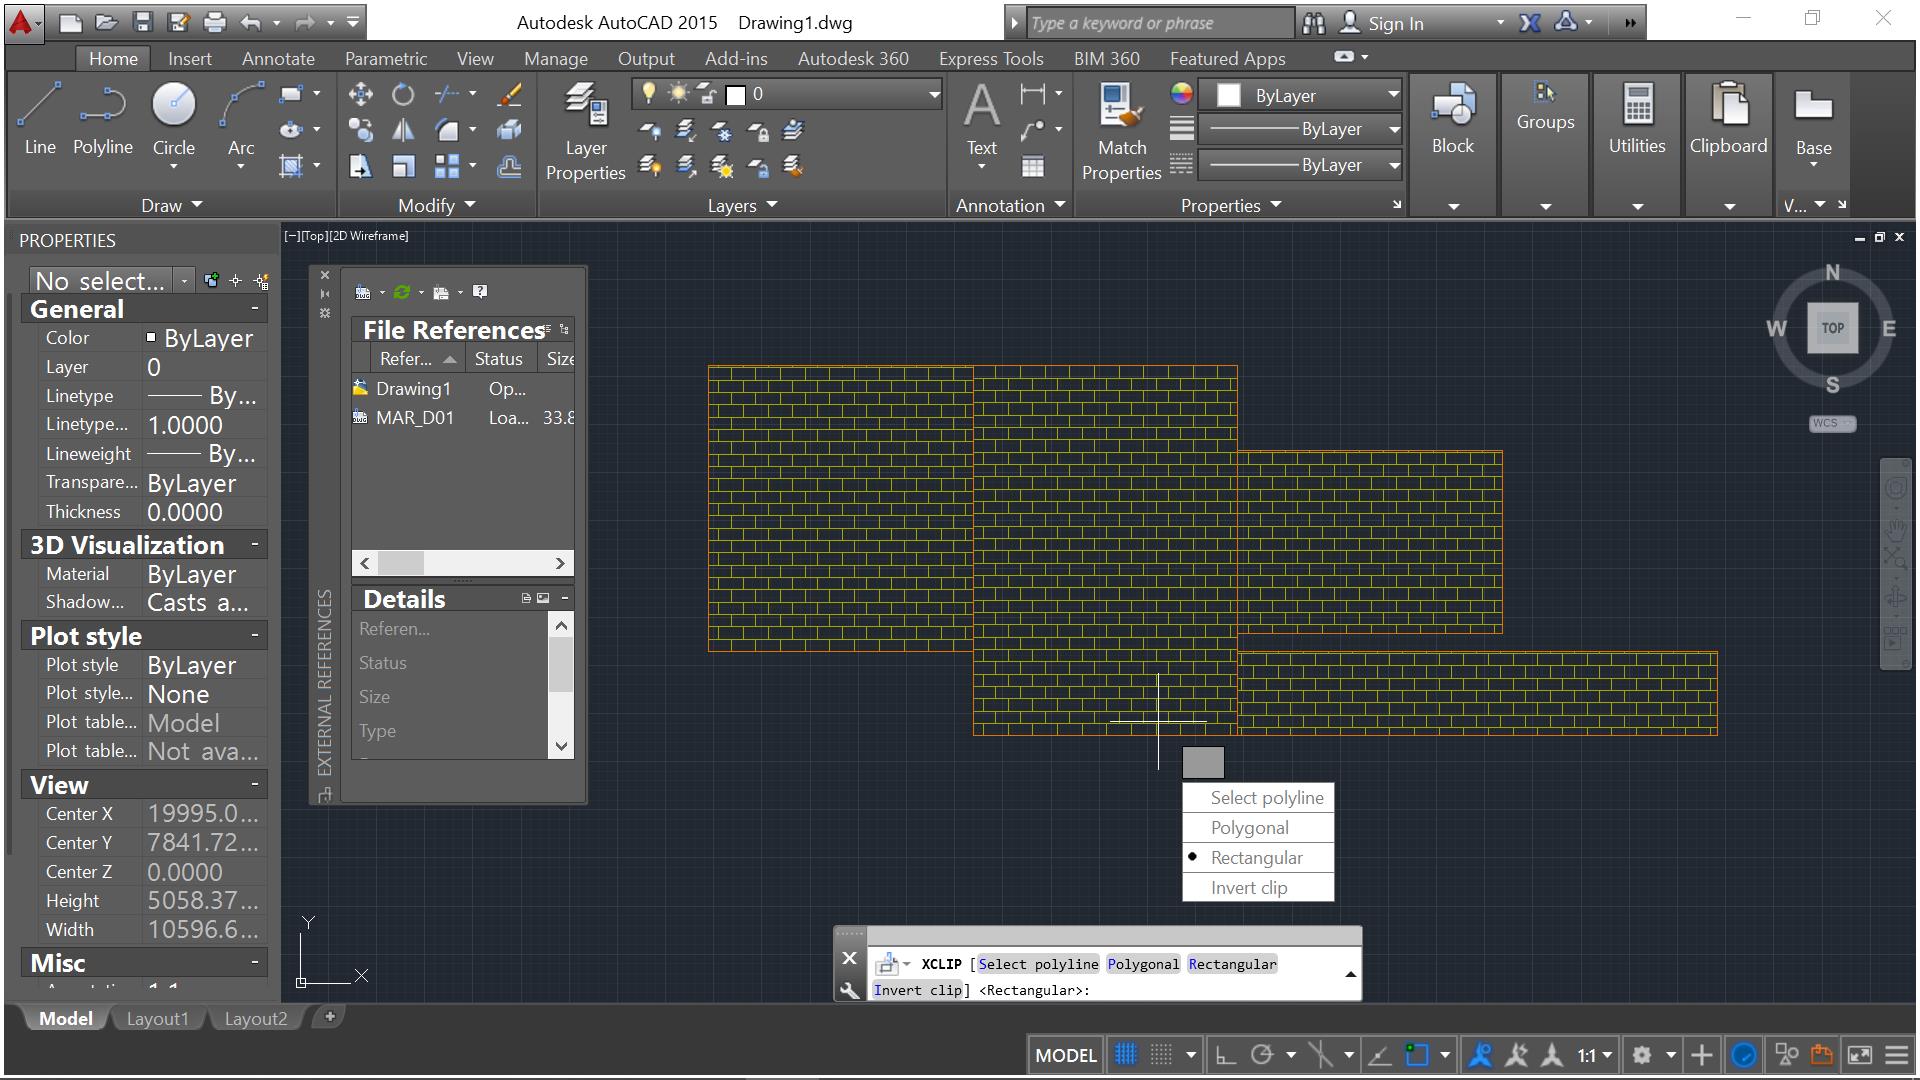
- Next, select your bounding box for the XREF: Select Polyline (select and existing polyline, if you have a desired shape prepared), Polygonal, Rectangular or Invert Clip. Here I chose Polygonal
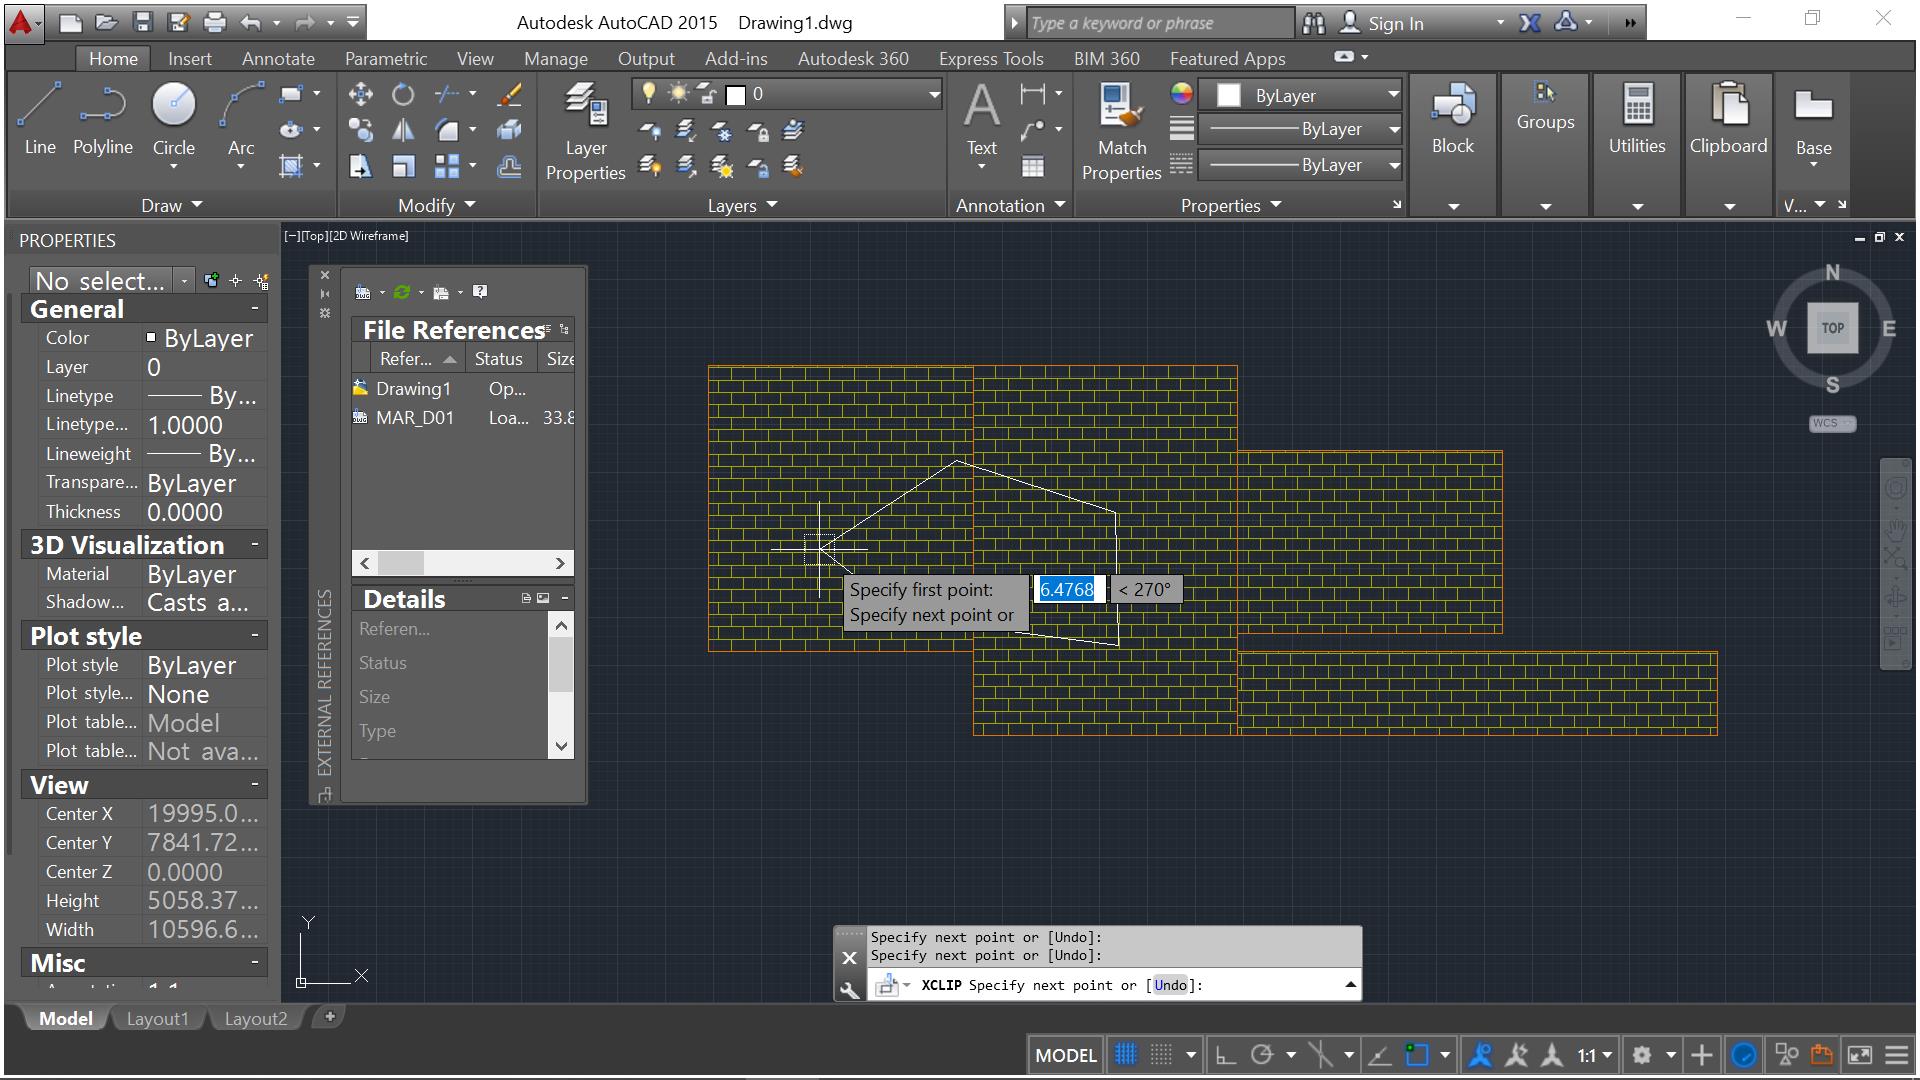
- Specify points to your desired shape or outline, here you have a variety of sides and option as how you want to clip the drawing. Press Enter.
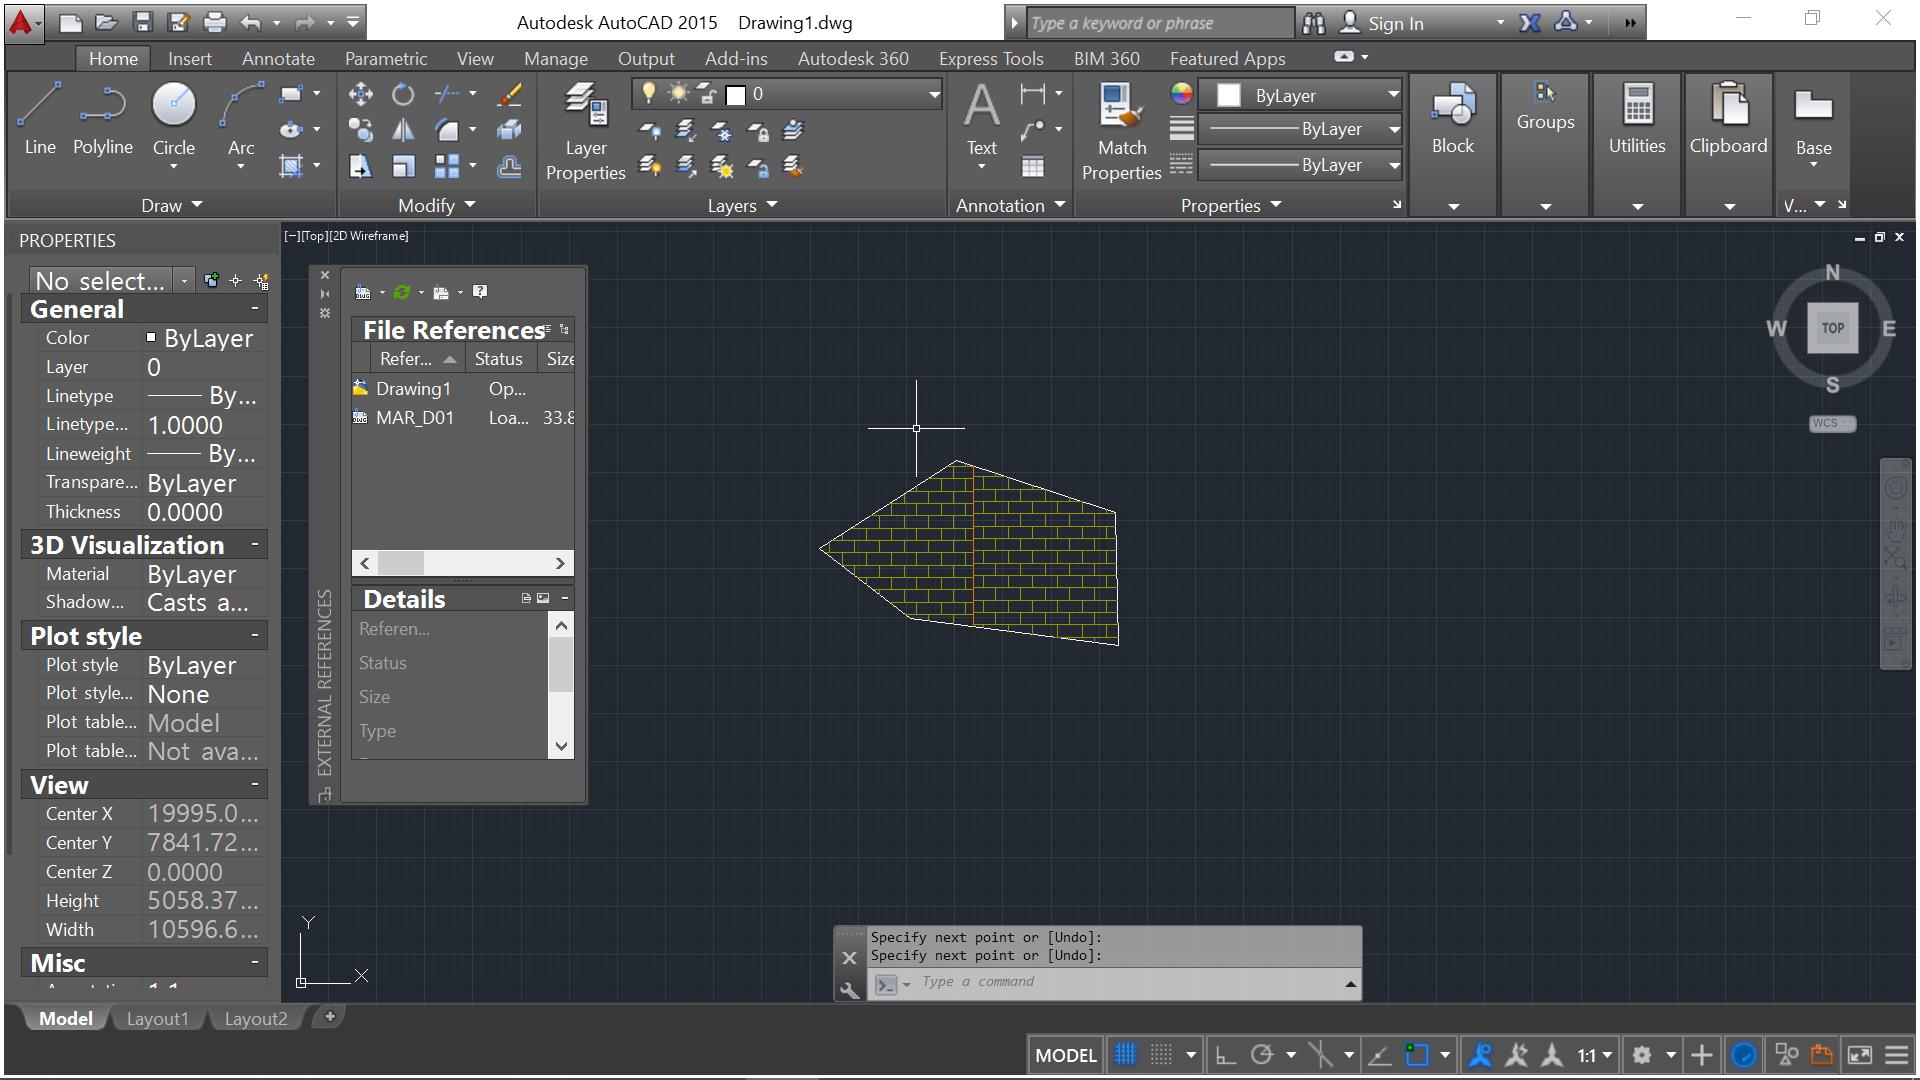
- Voila, you have achieved to contain your XREF to your desired shape or outline. ———————————————————————————————
- To delete the boundary and fit it in a different shape, you can repeat Steps 4 to 6 and choose OFF or DELETE.
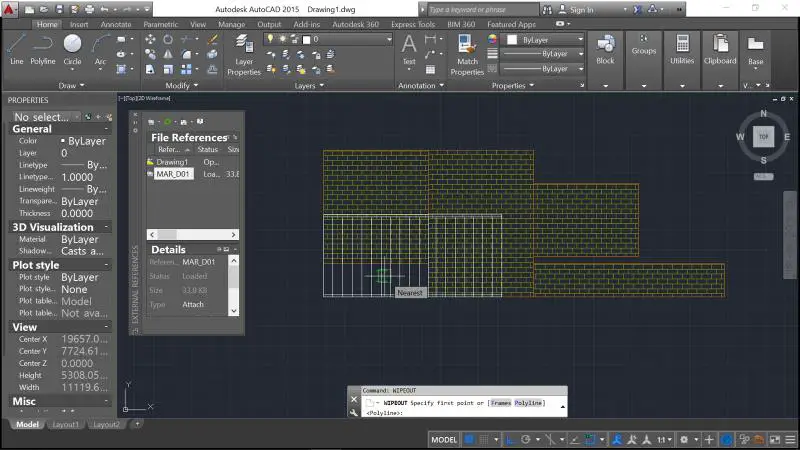
My next tool of choice is WIPEOUT. Despite what the name suggests, it would not wipe out your drawing but rather it is an effective tool in masking shapes that would otherwise be manually trimmed in an exploded component. With this tool, I can afford to retain design elements that is otherwise arduous to edit and revise sooner or later. Take for example creating screen behind brick walls. Instead of exploding the file (which is messy), we can opt to a cleaner and easier means of wiping the shuttered areas out while not having to deal with all the editing clutter and revisions:
- Working from our previous file, we can add elements in front of the brick wall by using wipeout. First, prepare by identifying the areas to mask (here we used rectangles). Type in the command line, WIPEOUT
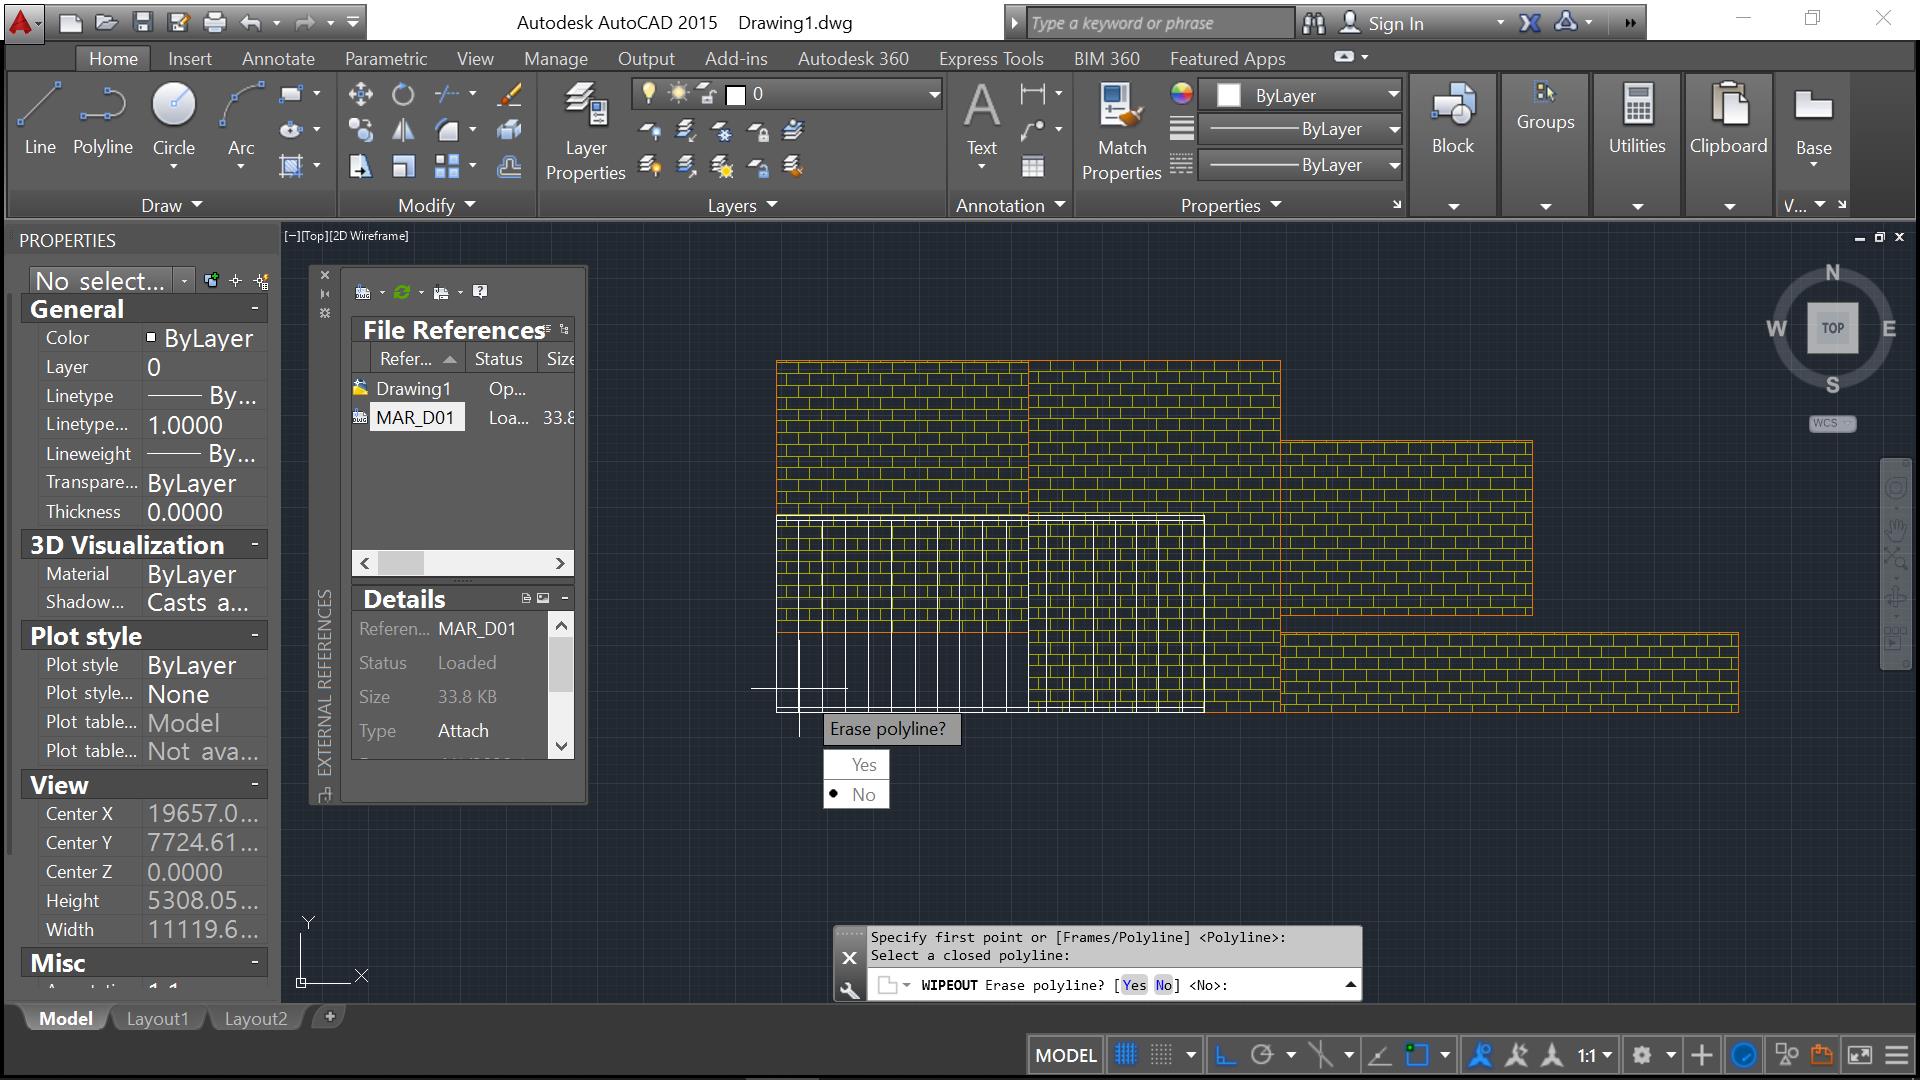
- The command line will prompt you to select or outline the frames or polylines. Here we have selected Polyline. Proceed to click on the rectangle we made earlier.
- Upon selecting the polyline, it will ask you whether to delete or keep the polyline. Click your preferred step. Here, we chose to delete it.
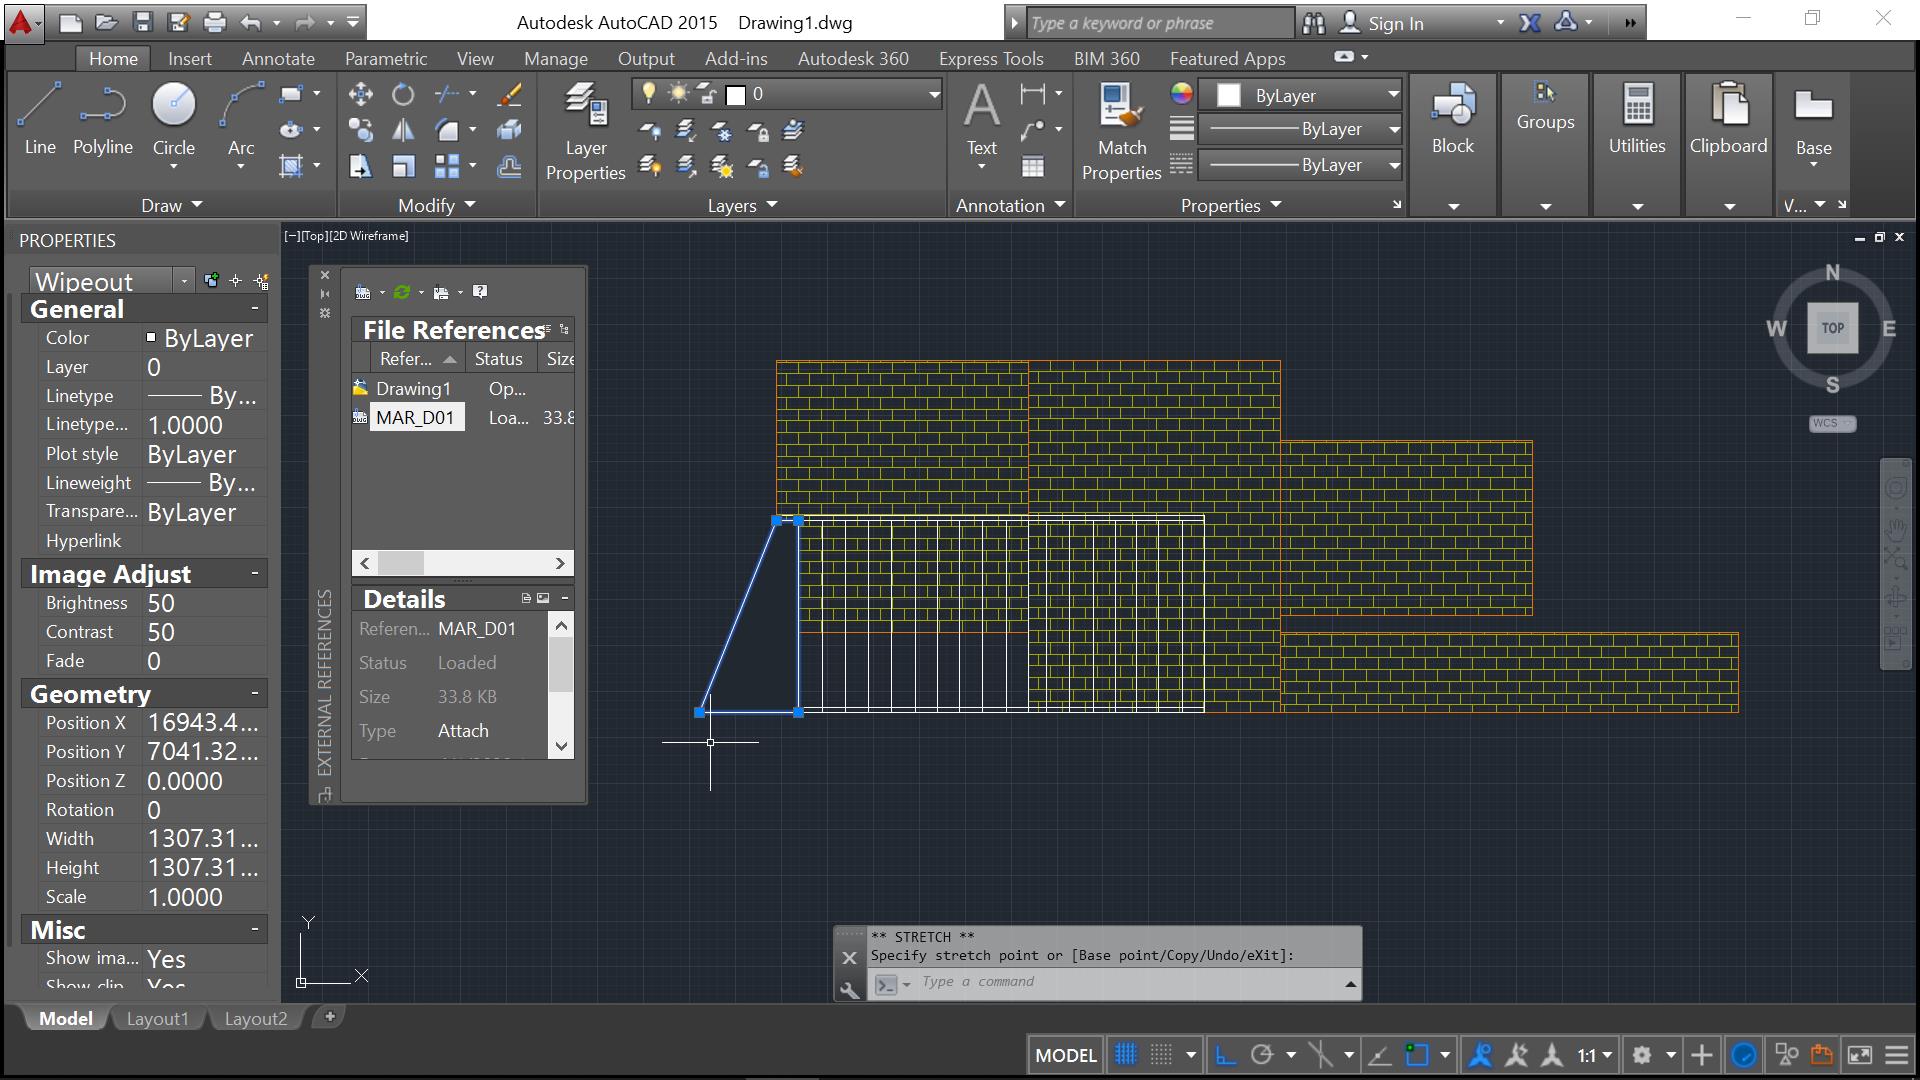
- You can see that the polyline has been converted to a solid entity with control points that will allow you to manipulate the wipeout a bit further.
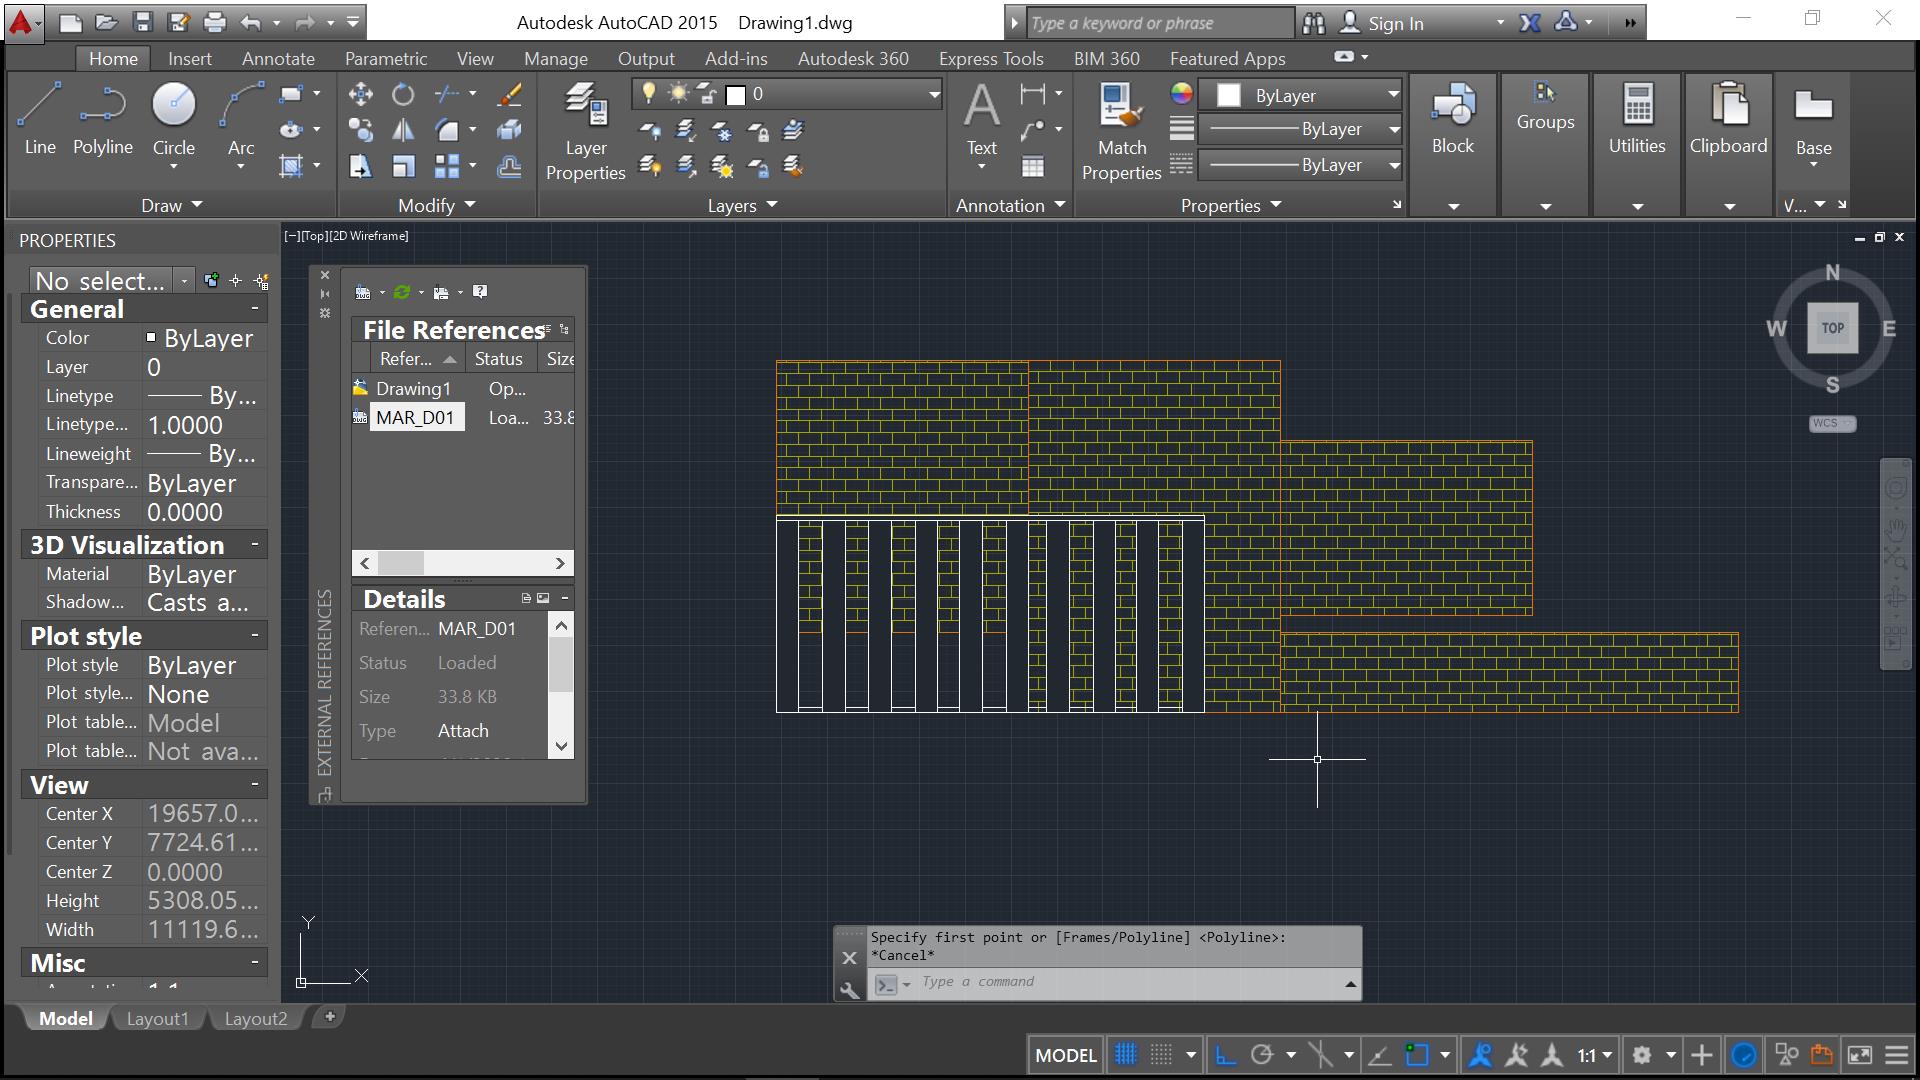
- Multiply or modify the wipeout and we arrive to our initial intention of creating an easy shuttered brick wall. ————————————————–
For more thorough discussion about the wipeout command, check our previous posts here.
Hope these 2 simple tools can help you in creating drawings that are easy to access, share and edit. If you have any question in relation to clip and wipe out tools or any other Autocad drawing management tools, please feel free to post your questions in the comment section below.
He has recently started to adopt Revit in his architectural practice for 3D and BIM functionality.
- Which CAD Software Should You Learn to Begin Your Career as a CAD Operator in 2024? - March 29, 2024
- How to use Chat GPT to create AutoCad lisp - March 15, 2024
- The Advent of Generative Design: Autodesk’s Fusion 360 and AI Integration - March 8, 2024


Leave a Reply