Since AutoCAD 2008, you can automate the sizing of annotation, such as text and dimensions, in multiple viewports with varying scales. In this tutorial, you practice using this feature, called annotative objects.
The following objects can be annotative, meaning that they can size automatically:
- Text (single-line text)
- Mtext (multi-line text)
- Dimensions
- Multileaders (which are new for AutoCAD 2008)
- Tolerances (in frames)
- Hatches
- Blocks
- Block attributes
Note that objects that use styles — text, dimensions, and multileaders — require an annotative style as well.
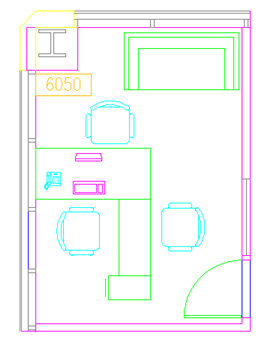
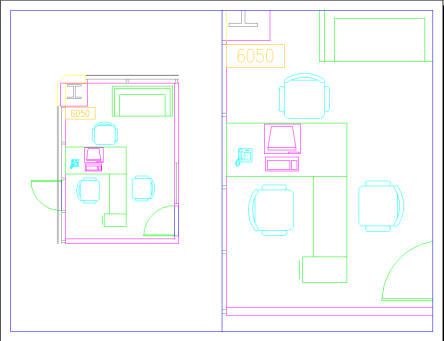
In this tutorial, to keep things simple, we’ll just dimension the following drawing, which I extracted from AutoCAD’s sample drawing (in the Samples folder) db-samp.dwg.
 Follow these steps:
- Click a layout tab, or the layout button on the status bar.
- Choose View tab>Viewports panel> New (or View > Viewports, the VPORTS command) and insert the viewports that you want. If possible, decide which scales you will use before adding annotative objects.
- Select a viewport and set its scale in the Standard Scale item of the Properties palette. Do the same for each other viewport. Here I have two viewports: the left is 1/4″ = 1’0″ (1:48) and the right is 1/2″ = 1’0″ (1:24). At the same time, check that the Annotation Scale value (shown in the Properties palette) is the same as the Standard Scale; if not, change it so that the two values are the same.

- Return to the Model tab.
- Choose Annotate tab> Dimensions panel and click the dialog box launcher at the right of the tab (Dimension> Dimension Style, the DIMSTYLE command). Choose the dimension style you want to work with and click Modify. Or, click New, and create a new dimension style. Either way, on the Fit tab, check the Annotative check box. Click OK. Notice that your style now has the annotative icon next to it. Click Set Current and then click Close.
- At this point, you should think a bit about which dimensions you’ll want in which viewport, but you can make changes later.
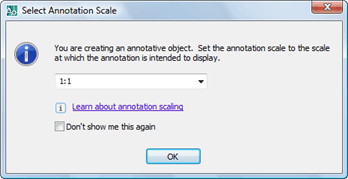
- Switch to a dimension layer. Choose Annotate tab> Dimensions panel> Dimension drop-down>Linear (Dimension> Linear Dimension, the DIMLINEAR command). If this is the first annotative object you’ve created in the drawing, you’ll see this dialog box, reminding you to set the scale. Click the drop-down list and choose a scale for one of the viewports that will show this dimension. I chose 1/4″ = 1’0″ because this dimension will go in the left viewport which is at that scale. Click OK.
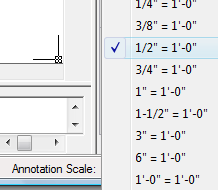
- Place the dimension. Note that the annotation scale on the right side of the status bar shows the scale that you chose. You can change the scale at this time. If you place other dimensions, they will also be at the same scale.

- To place a dimension that will be visible at a different scale, such as for our right-hand viewport, choose the scale from the Annotation Scale list on the status bar.
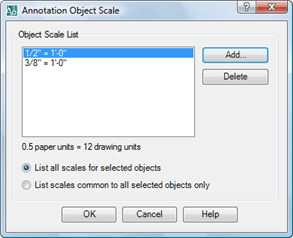
- For a dimension that will appear in more than one viewport, place it at any of the scales, then select it, right-click it, and choose Annotative Object Scale> Add/Delete Scales. In the Annotation Object Scale dialog box, click Add. Choose the new scale and click OK. Click OK again to return to your drawing. Use the same procedure to remove or change annotation scales for objects.

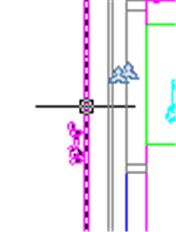
Note: If you hover the cursor over the dimension, you’ll see that it now shows a double annotation icon, indicating that the dimension has more than one scale.
That’s it! Just display the layout and you’ll see that the dimensions are all the same size. Even dimensions that show in both viewports, at more than one scale, are the right size in both viewports.
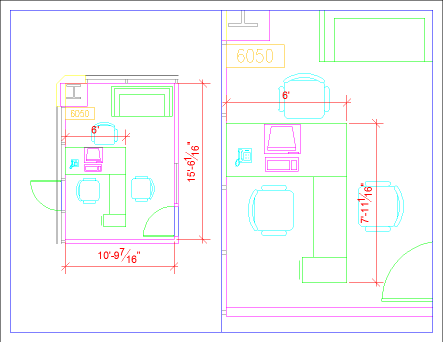
In this drawing, you can see that one of the dimensions of the desk (7′-1 11/16″) doesn’t appear in the left viewport. That’s because it doesn’t have the 1/4″=1’0″ scale. But the 6′ dimension has both scales, so it appears in both viewports.
- Combine or subtract 2D shapes to create custom shapes - February 17, 2022
- Working with linetype scales - January 18, 2022
- Rename named objects–blocks, dimension styles, layers, and more - December 21, 2021

 Instagram
 LinkedIn
 Facebook
[…] the Behavior section, you can make a block Annotative (more info here), force it to scale uniformly and choose whether to allow […]
Good
thank you
i want to print annotative(not current annotation) scale, automatically/manually in a scale heading/text field/lable.
thanks and regards
sivaram
..
all the tips are very very use ful for autocad users.
thank u.
regards
manoj
thanks 🙂
[…] Tutorial: Automate annotation scaling … – Since AutoCAD 2008, you can automate the sizing of annotation, such as text and dimensions, in multiple viewports with varying scales. In this tutorial … […]