
A workspace defines your user interface — which toolbars, menus, and palettes (including the command window) appear, and where. Workspaces are a great feature because you can save multiple workspaces to reduce the time you spend fussing with these objects — opening them, closing them, and moving them around.
AutoCAD comes with default workspaces and you can change those or create your own. In fact, the default workspaces are pretty useless unless you have a huge screen; they leave so many items open that there’s no room to draw!
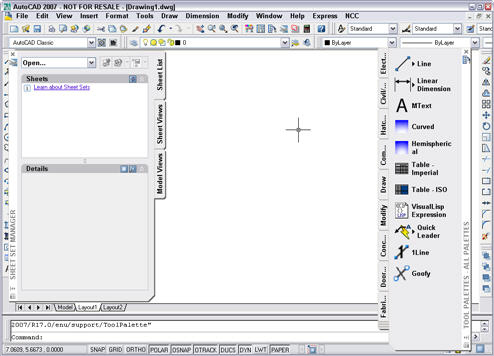
Here’s is AutoCAD 2007’s AutoCAD Classic workspace — at least I think so. It’s possible that I changed it and forgot.
Follow these steps:
- Close all the items that you don’t want. In this example, I don’t want the Sheet Set Manager or the Tool Palettes.
- Display all the items that you want. Remember that this includes toolbars (including custom toolbars), palettes (such as the Properties and Tools palettes), and menus.
- Set up the screen just the way you want it. Remember to not only display the items, but dock or hide them the way you want.
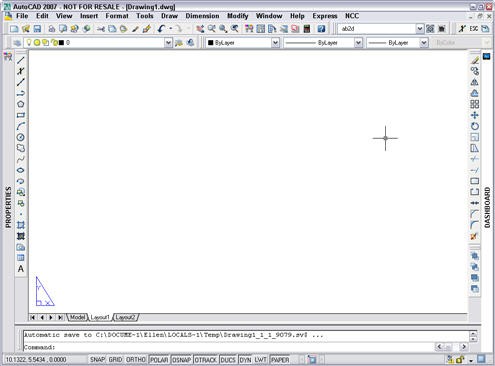
- If the Workspaces toolbar isn’t displayed, right-click any toolbar and choose Workspaces.
- From the Workspaces toolbar drop-down list, choose Save Current As to open the Save Workspace dialog box.

- Either enter a new name to create a new custom workspace, or click the down arrow to choose an existing workspace (if you want to redefine it).
- Click Save.
- If you chose an existing workspace, choose Yes at the dialog box asking you if you want to replace the workspace.
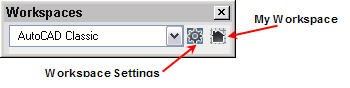
Here you see my preferred workspace: the Properties palette docked and collapsed at the left, the Dashboard docked and collapsed at the right (although sometimes I leave it uncollapsed), my choice of toolbars, including the Workspaces toolbar, and a small custom toolbar at the upper right corner.
- A couple more steps will make the workspace feature even more useful: choosing a Home workspace. On the Workspaces toolbar, click the Workspace Settings button to open the Workspace Settings dialog box.
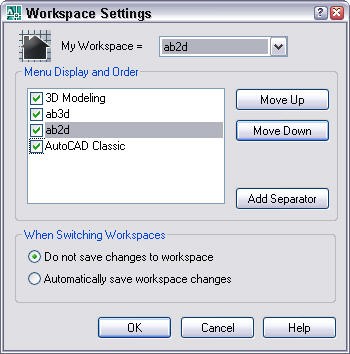
- From the My Workspace drop-down list, choose your new workspace or another workspace.
- If you want, in the Menu Display and Order box, you can change the order in which the workspaces appear by choosing any workspace and clicking the Move Up and Move Down buttons. You can also uncheck a workspace if you don’t want it to appear on the list.
- Click OK. You can now use the My Workspace button on the Workspaces toolbar as a shortcut to instantly switch to your Home workspace.
Note: You can also create a workspace in the Customize User Interface dialog box. (Use the CUI command.)

- Combine or subtract 2D shapes to create custom shapes - February 17, 2022
- Working with linetype scales - January 18, 2022
- Rename named objects–blocks, dimension styles, layers, and more - December 21, 2021
 Instagram
 LinkedIn
 Facebook

[…] If you’ve invested a lot of time setting up AutoCAD’s UI the way you like it, I seriously recommend that you save your user interface as a custom workspace. […]